Running automated tests in a CI environment is an important step toward improving code quality, code standards and ensuring that only working code is merge into other environments.
With tools available in AWS, we have some low handling fruit for teams to add some automated safeguards.
We’re going to walk through a CI Workflow for CodeCommit and CodeBuild to configure the AWS Services.
Create buildspec file
Before diving into the AWS CodePipeline, let’s talk about the buildspec file.
A buildspec is a collection of build commands and related settings(in YAML format) that CodeBuild uses to run a build. Without a build spec, CodeBuild cannot successfully convert your build input into build output or locate the build ouput artifact in the build environment to upload to your output bucket.
Create a buildspec.yml file at the root(top level) of your Vuejs project and paste the following code.
Note: I prefer create a folder to avoid mixing the Vuejs project with CI/CD resources. You can create a folder with the name of your company/brand. For example:
.idesoft/buildspec.yml,.aws/buildspec.yml,.ci/buildspec.yml.
| |
The buildspec.yml file contains 4 phases:
- install: Includes commands to run during installation. It installs/upgrades
npm,pipandawscli(required to sync files with AWS S3). - pre_build: Commands to run before build. Install the depedencies, run the lint and unit tests.
- build: Command to build your Vuejs project.
- post_build: Commands to sync
distdirectory with S3 bucket when the build process completes successfully.$CODEBUILD_BUILD_SUCCEEDINGis an environment variable that contains 0 if the build fails, or 1 if the build succeeds.
This completes the buildspec setup, don’t forget to push your code to AWS CodeCommit.
Create AWS S3 Bucket
At this point, you will need to create a bucket. Buckets are a logical unit of storage within S3.
After you log in to your AWS Console, navigate to the S3 console(you can do this under AWS services search for S3), then click on the orange Create bucket button.

At the create bucket wizard, fill up the information.
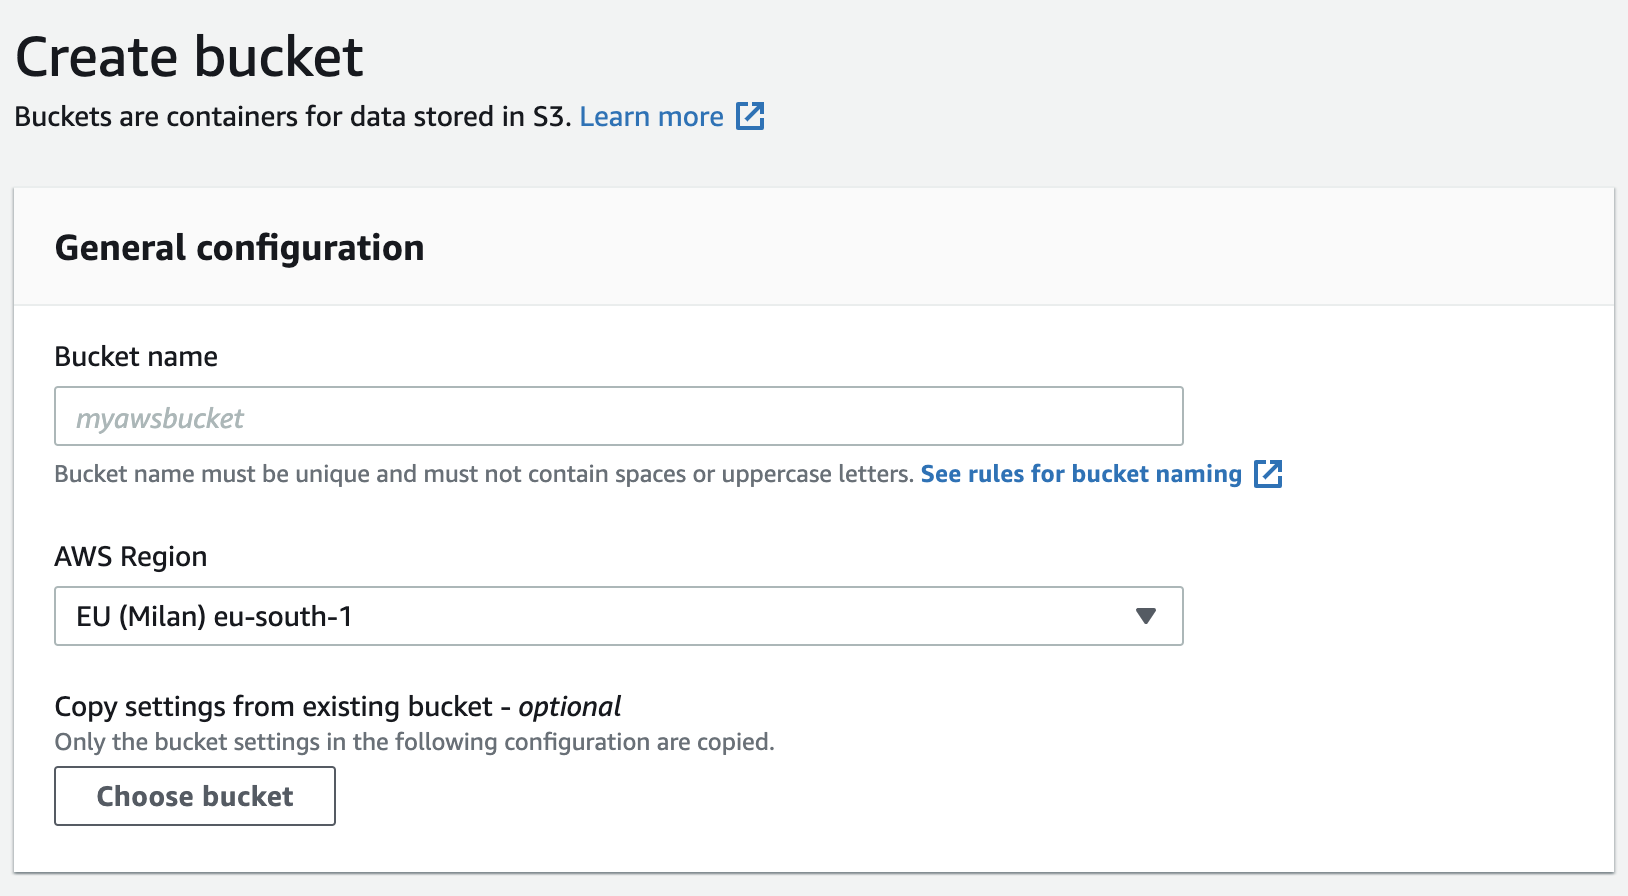
Bucket name: Enter your bucket name(bucket names are unique across the entire AWS platform), for example
curiosity-platform,bluebird-app. See bucket naming rules.AWS Region: Select your default region.
For the next section, disable Block all public access, because we need to use this bucket as Static Web Hosting, so we need to make all the bucket content as public.
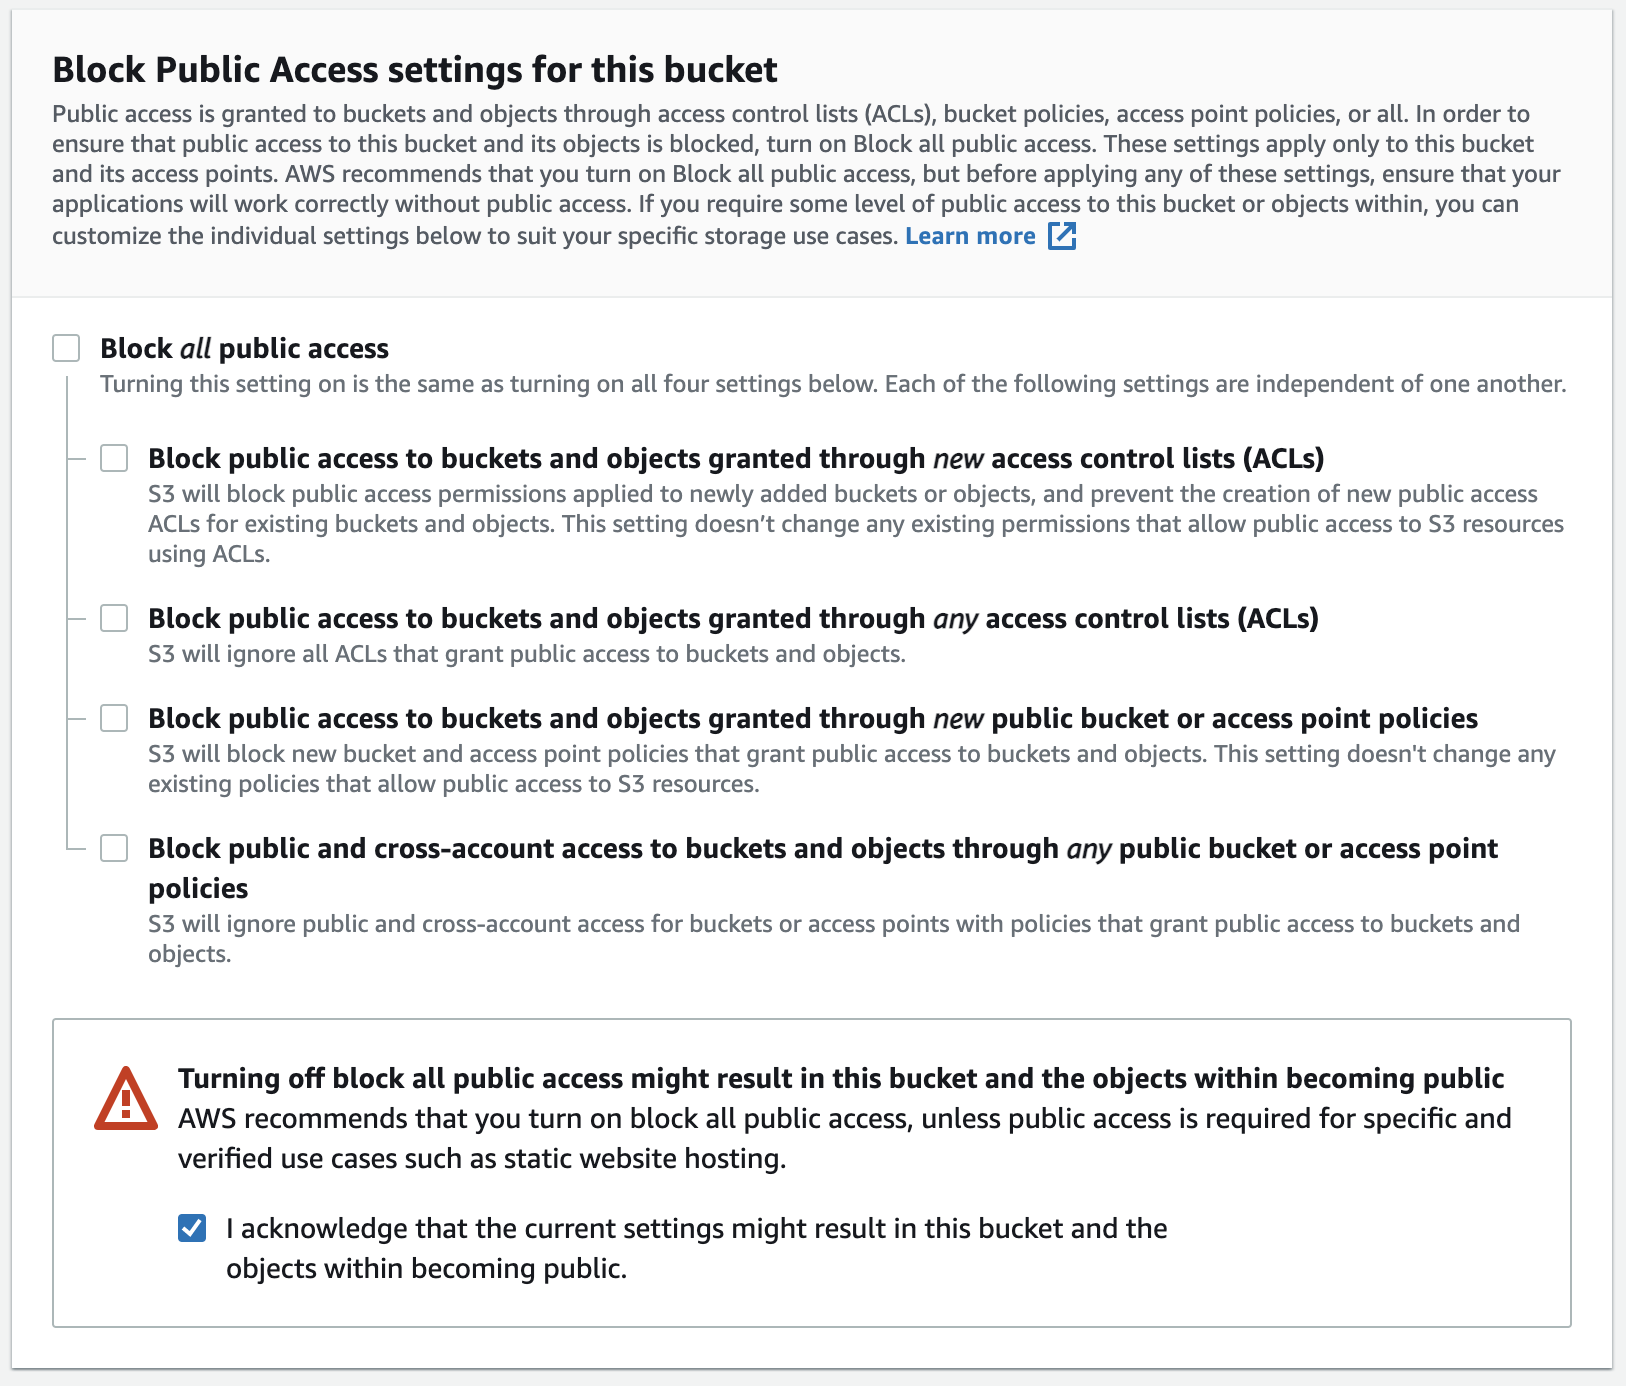
Don’t forget to accept that you agree to make public all the bucket content.
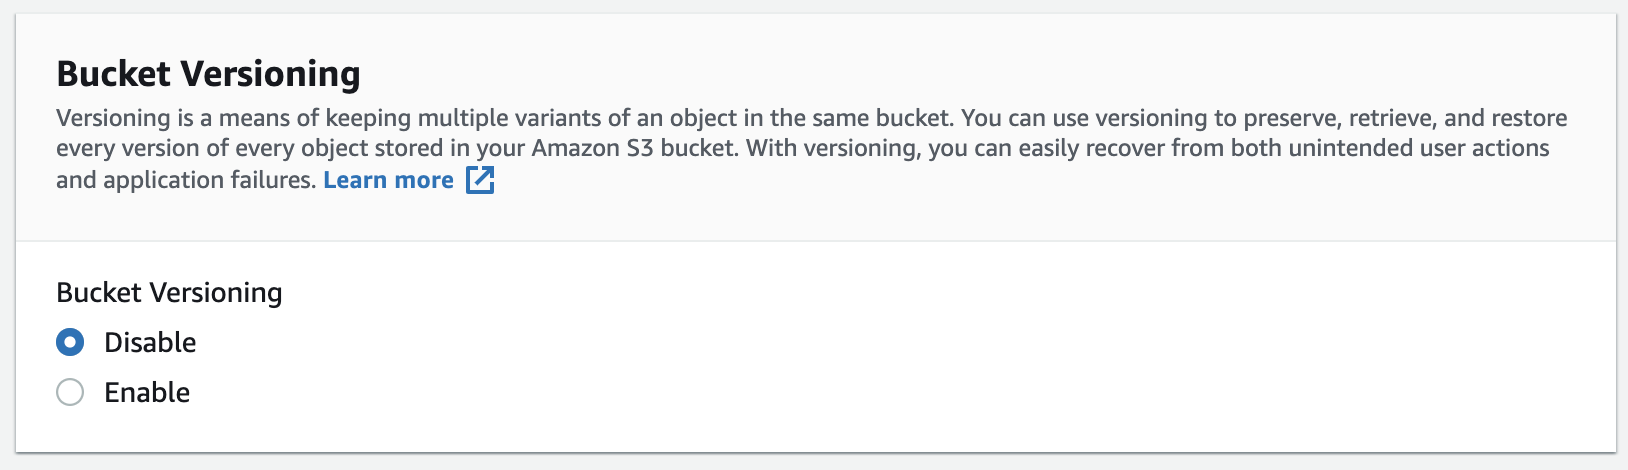
For the Bucket versioning step, we are going to disable versioning, we use Git and CodeCommit to keep multiple variants of an project and we can restore to another version.
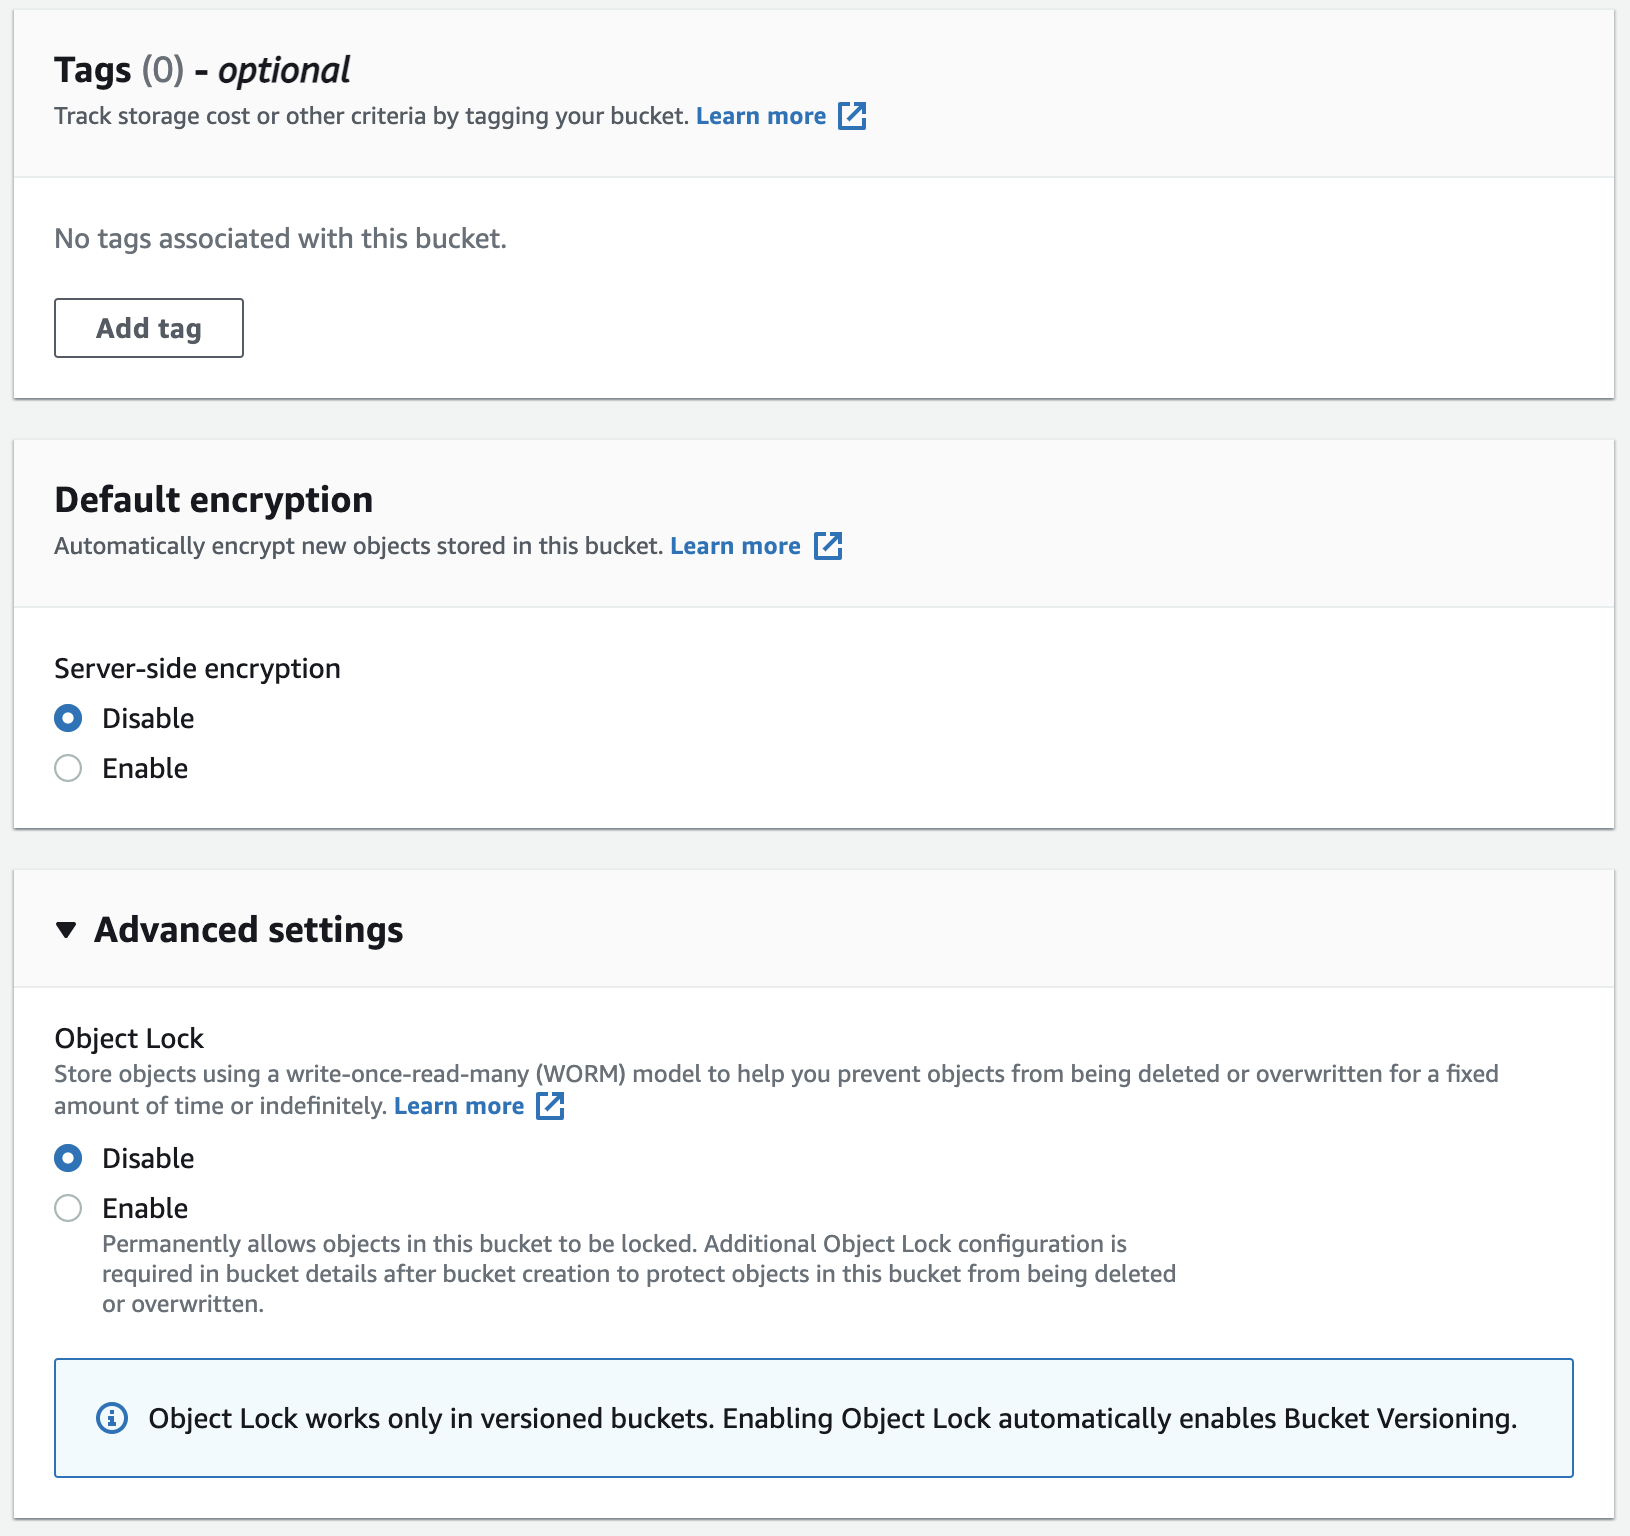
For the next sections, we can leave the default options and click on create bucket.
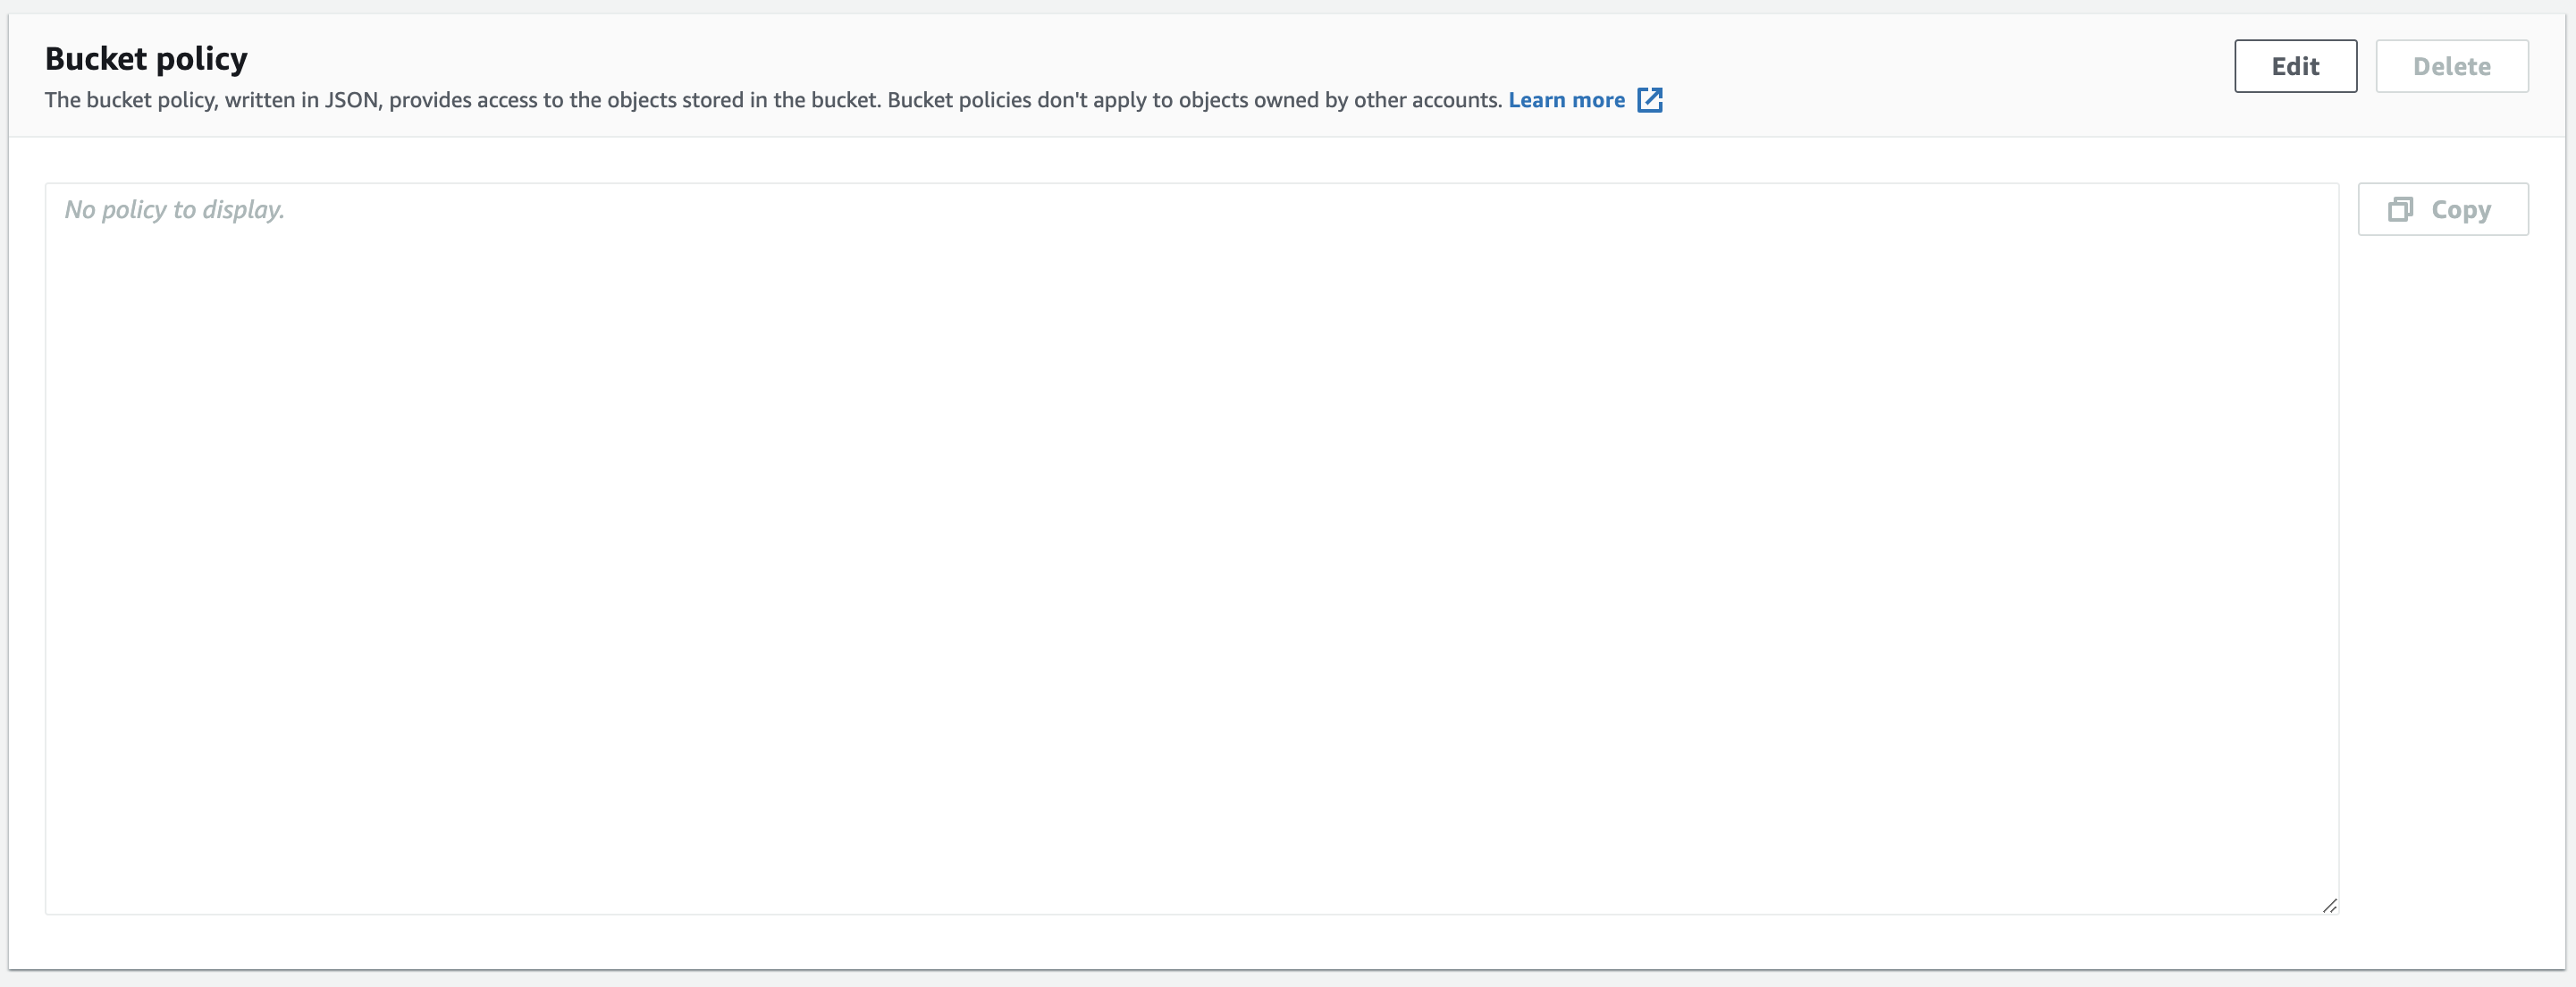
You should see your bucket listed, let’s configure permissions. By default S3 bucket permissions are deny all. To access your bucket’s content, you must explicitly define who can access it. These bucket permissions are called BucketPolicy.
To add a BucketPolicy, click on the Permissions tab, then scroll down to bucket policy section and click on Edit button.
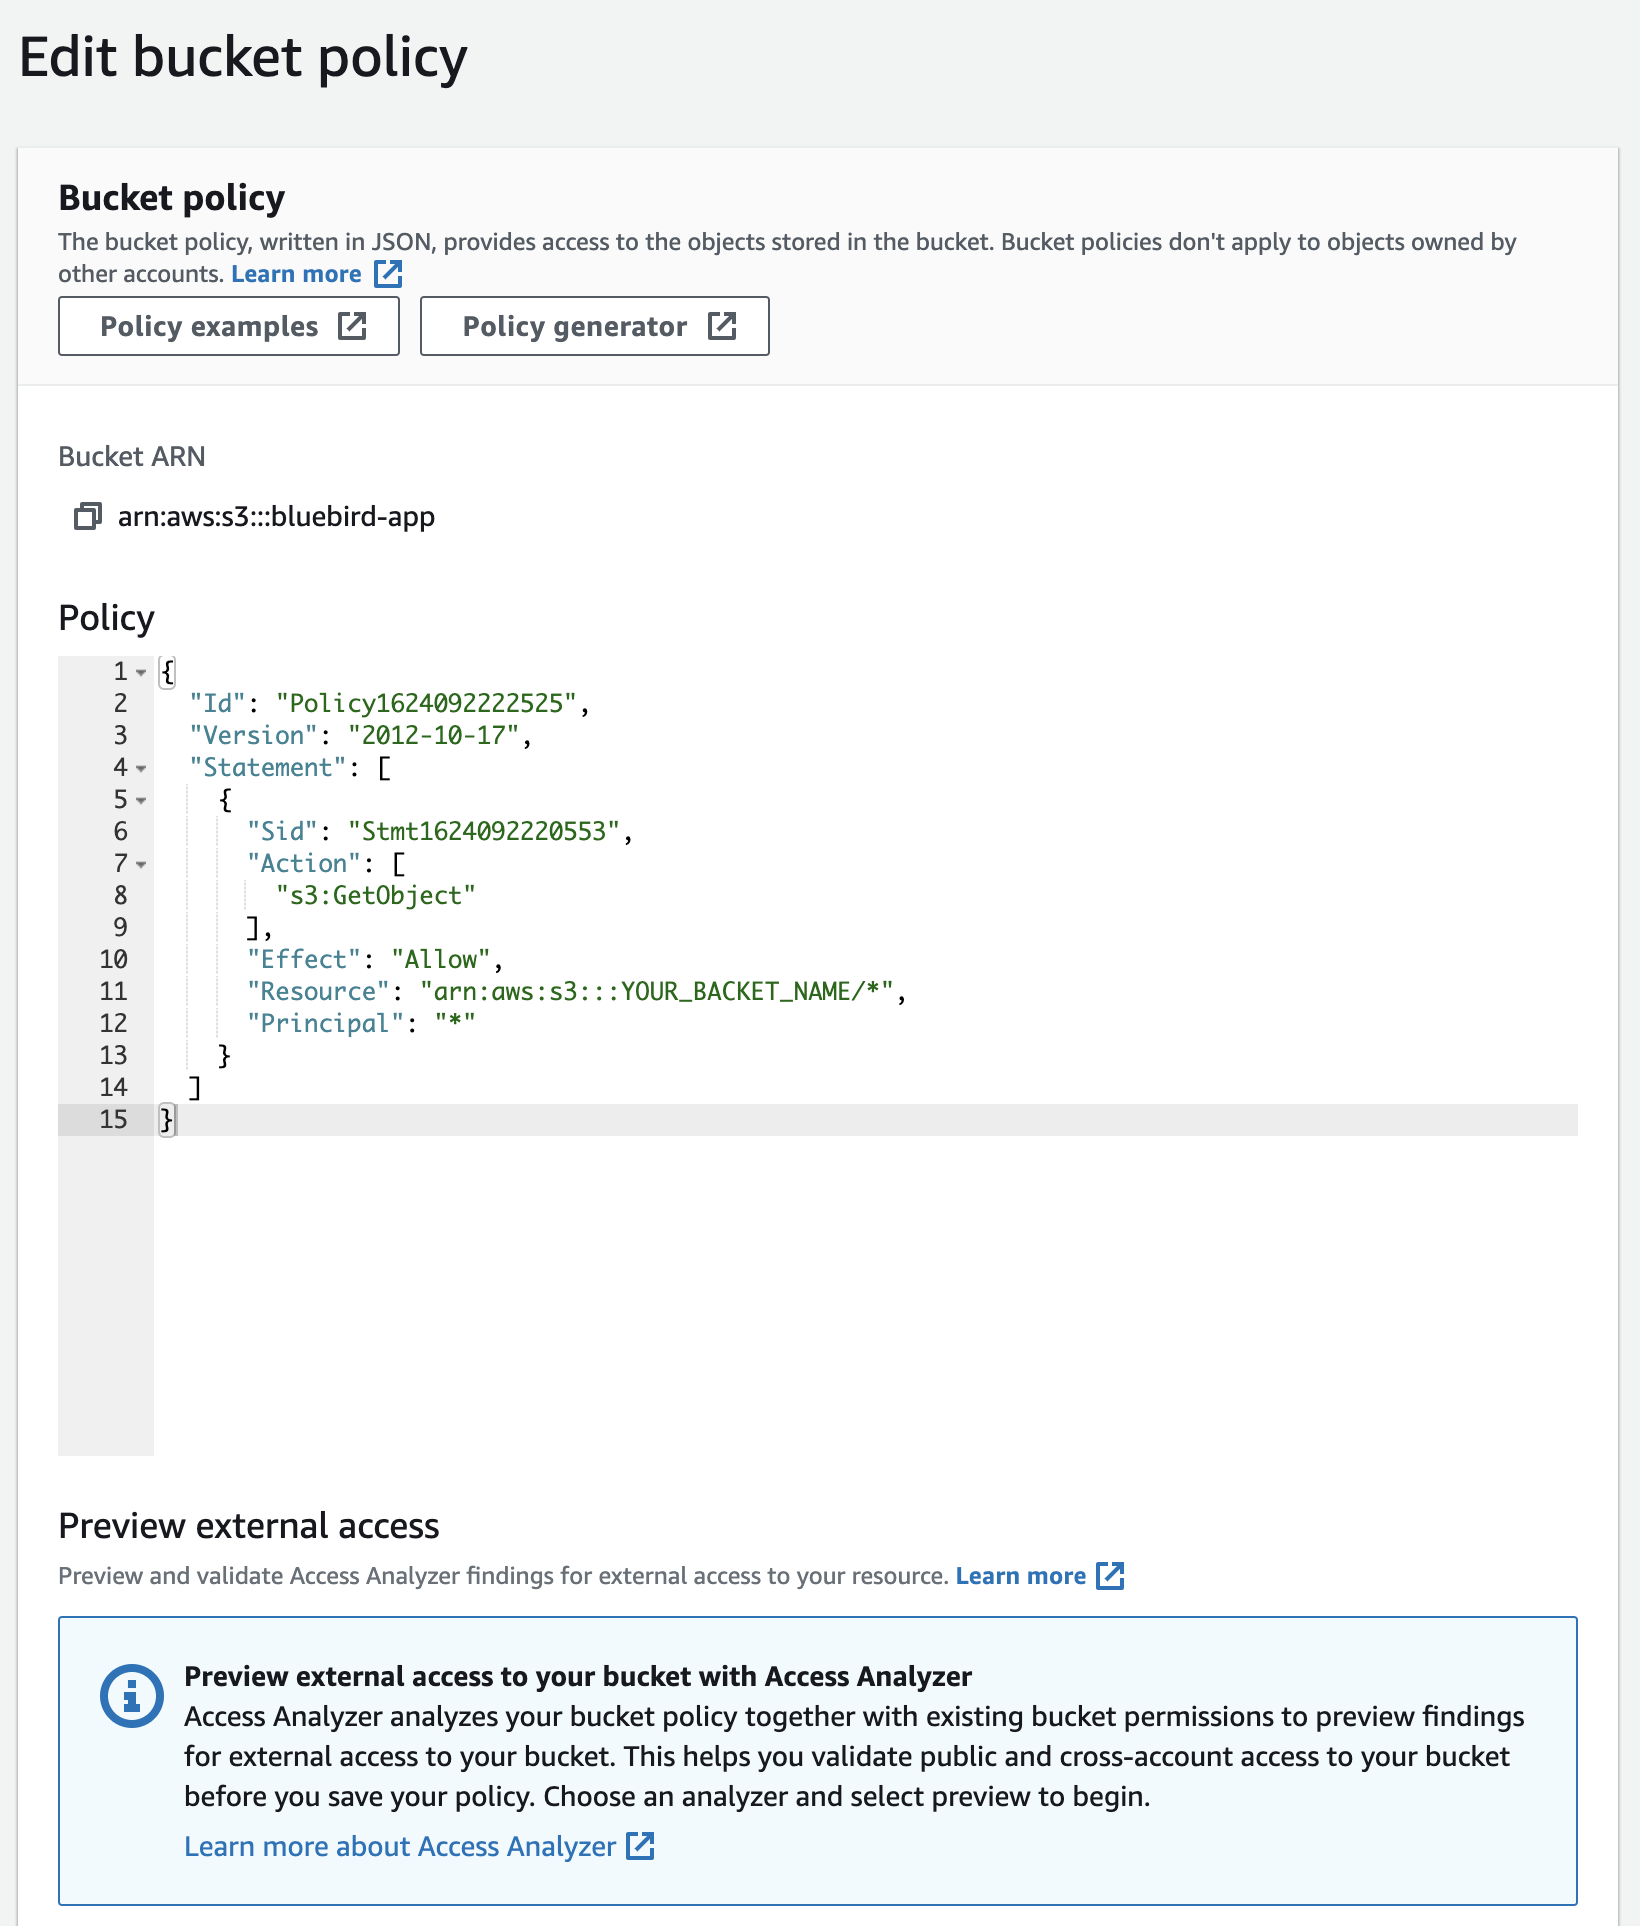
At the Bucket policy editor, paste the following configuration to allow anyone to read any file in your bucket.
| |
Bucket Policies can be quite complex and powerful. But, the main parts of the policy that you should be aware of are:
Effect: AllowPrincipal: *: Who the policy covers (*implies everyone)Action: [s3:GetObject]: The actions allowed (s3:GetObjectallows read-only access to all objects in your bucket)Resource: arn:aws:s3:::YOUR_BUCKET_NAME/*: Which bucket and objects the policy is about.
Replace
YOUR_BUCKET_NAMEwith your bucket name created in the previous step.
Once the Bucket Policy has been added, you can see a notice in red(Publicly accessible).
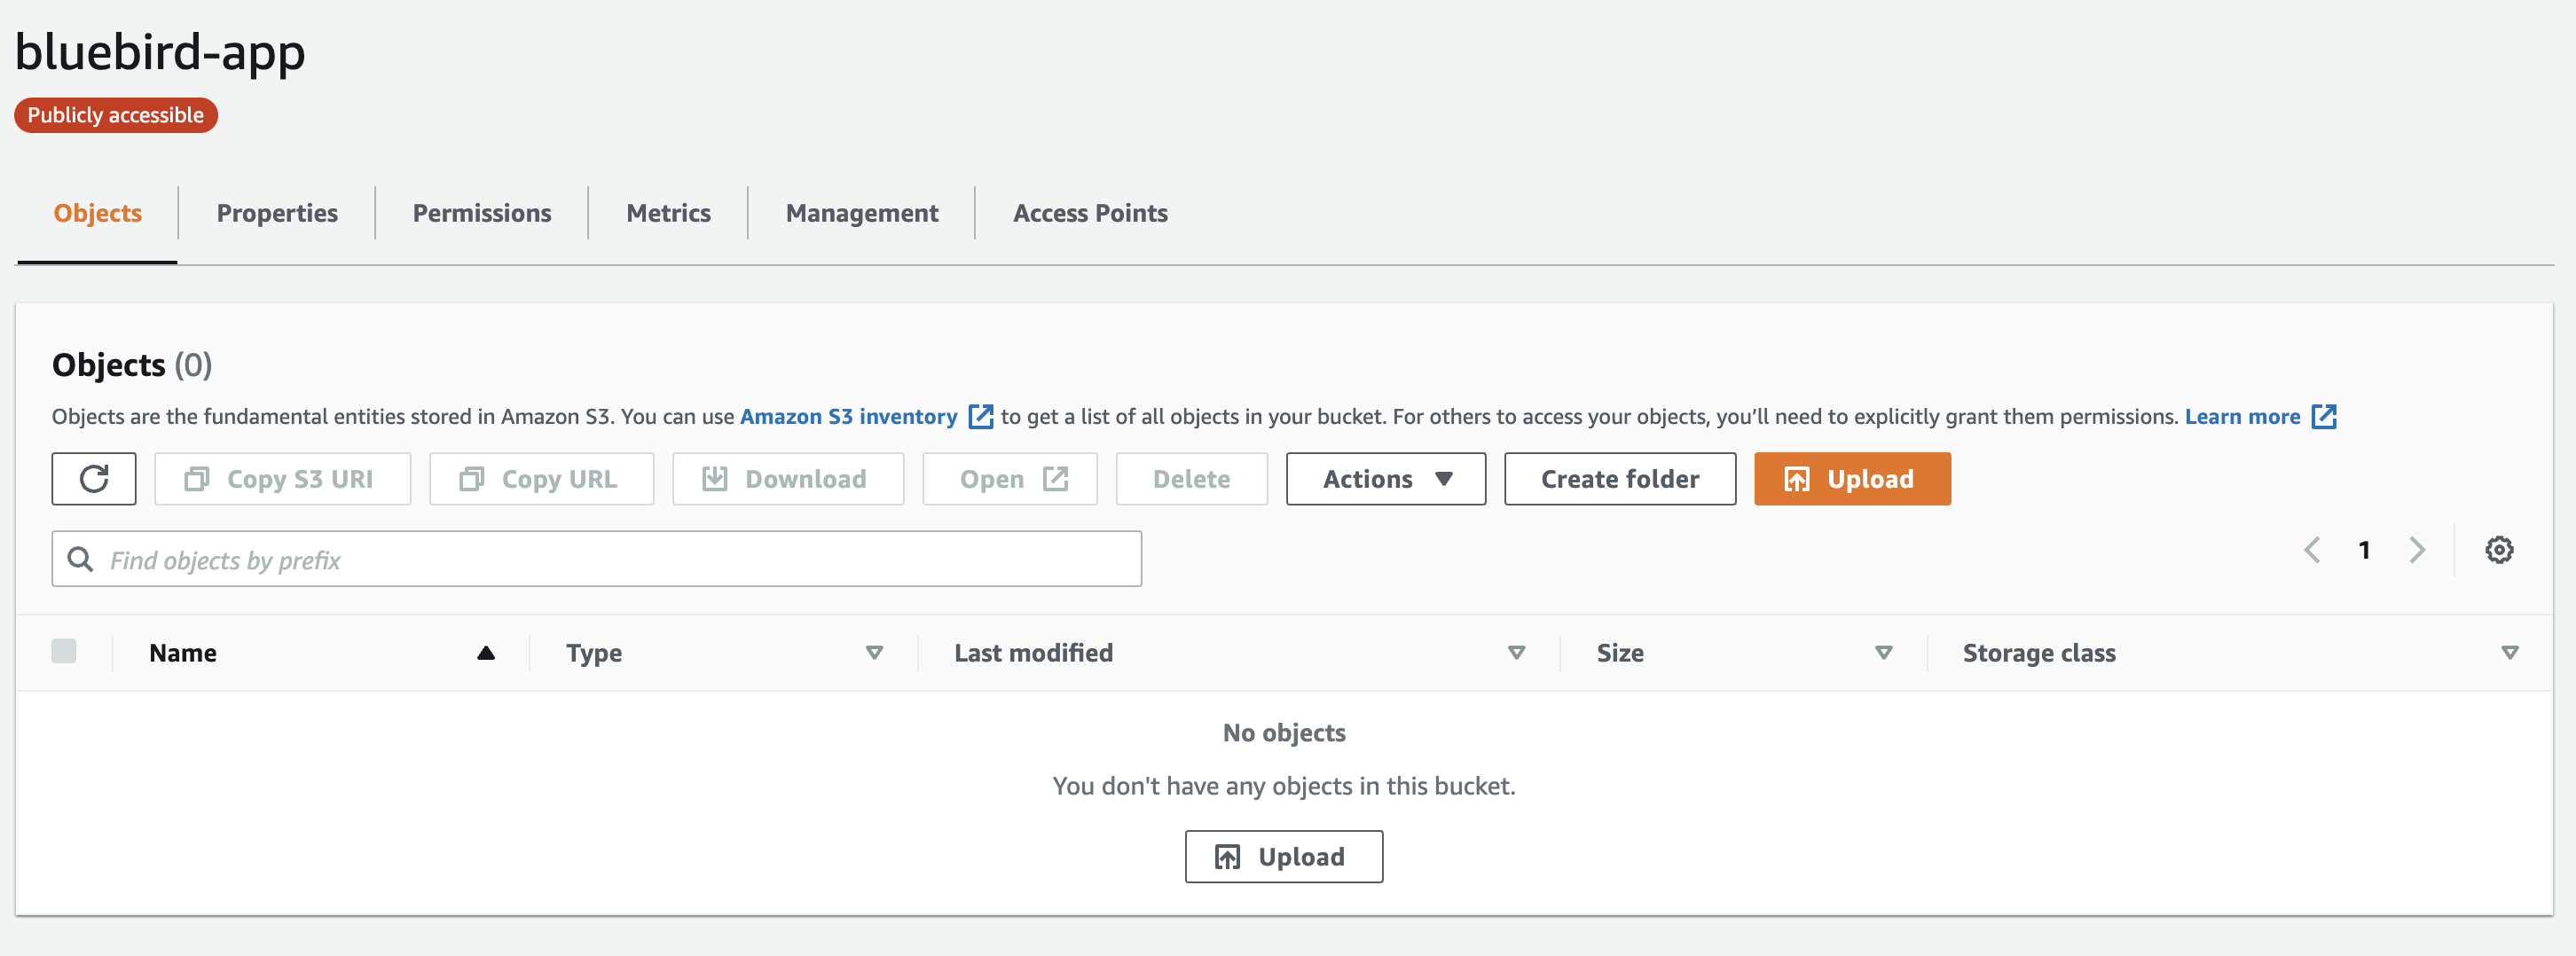
Now your bucket is ready and everyone can read all the objects in it.
Important: AWS S3 has ultra-low latency if you are geographically near the region that your bucket is hosted in. If you want to make sure all users can access your app quickly regardless where they are located, you should use AWS CloudFront.
CloudFront is a global Content Delivery Network(CDN) that securely delivers content(websites, files, videos, etc) to users around the globe.
Unfortunately, CloudFront is a topic that I won’t go into detail in this article. You can read this article for more details.
Create and configure AWS CodePipeline
The pipeline for Vuejs project would be pretty simple; with two phases.
- Source: Gets the latest commit from CodeCommit’s appropiate branch.
- Build: Install dependencies, build project and sync with S3 using an AWS CodeBuild.
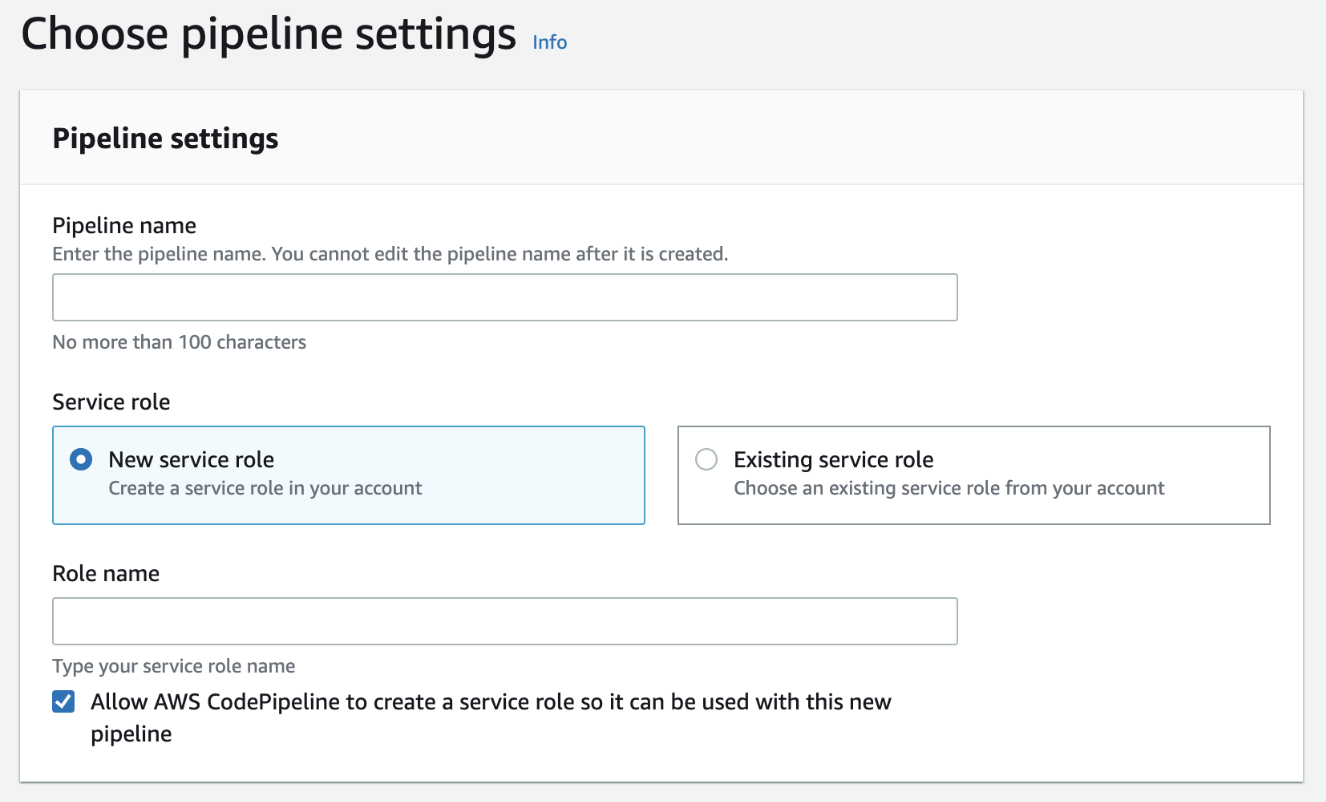
Navigate to AWS CodePipeline and click on Create Pipeline

At the create pipeline wizard, enter your pipeline name and service role, then go to the next section.
Source stage
For the source stage, select AWS CodeCommit as source provider.
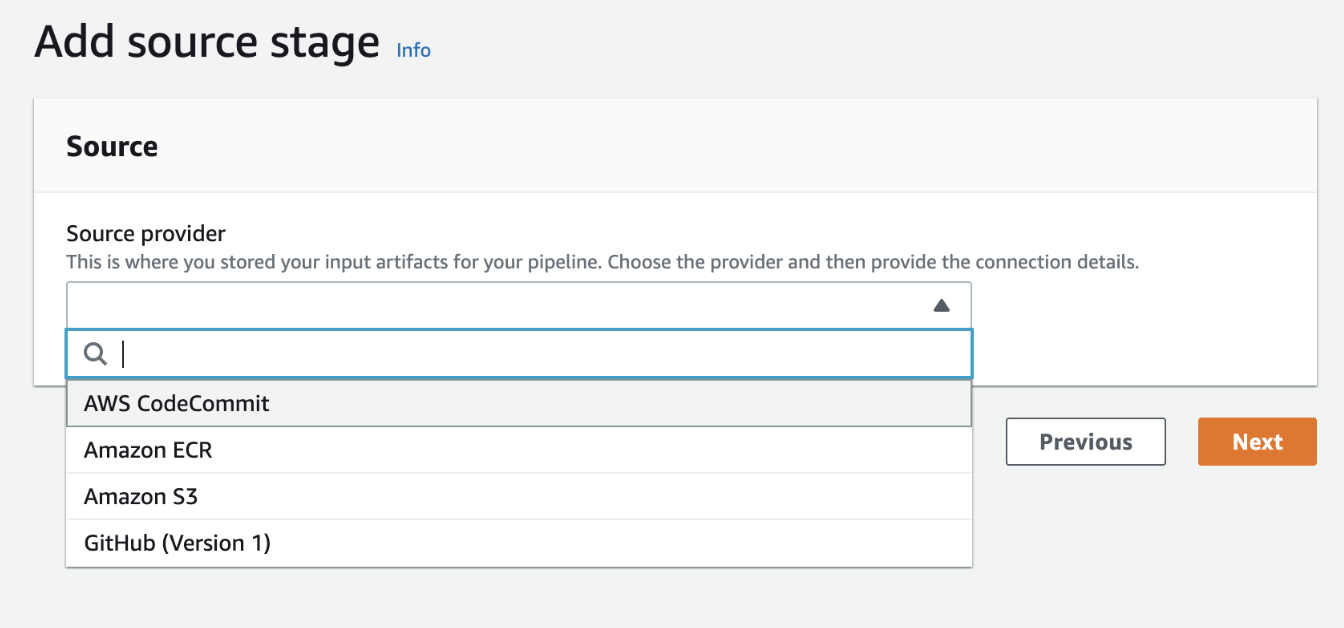
To continue, select your repository name and branch name. The selected branch will be used to check changes and automatically start the pipeline.
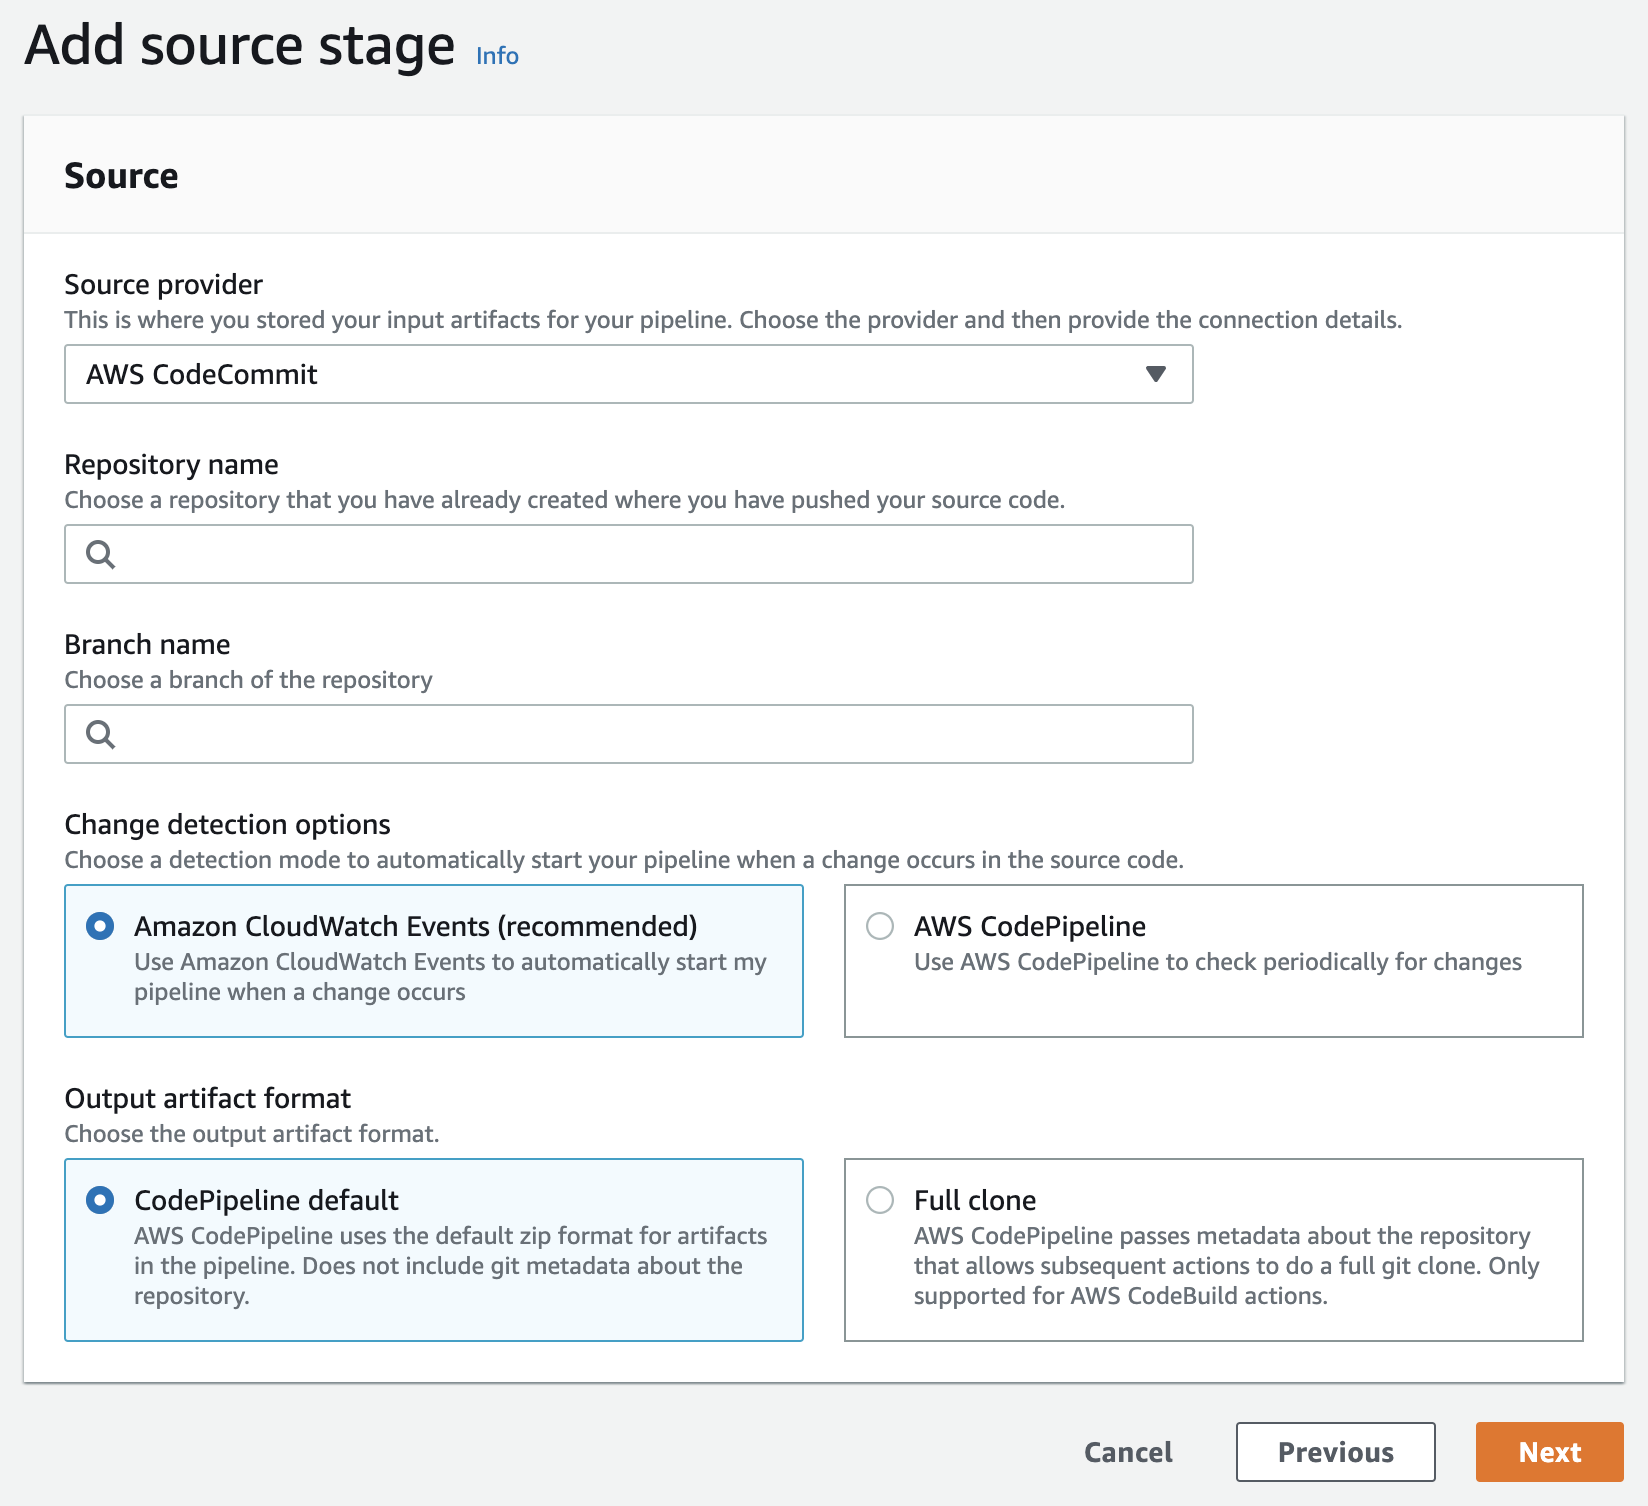
- Amazon CloudWatch Events allows us to automatically start the pipeline when a change occurs in a specific branch.
- CodePipeline allows us to get a zip format for each build of our pipeline.
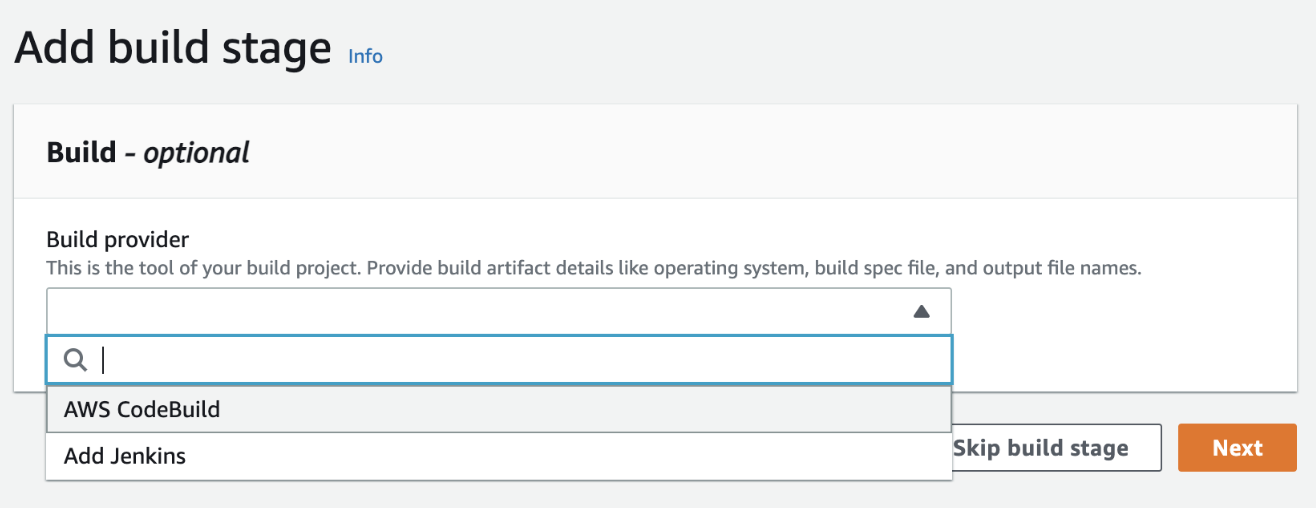
Build stage
In the build stage, select AWS CodeBuild as Build provider.
Once the build provider has been selected, fill up the following information.
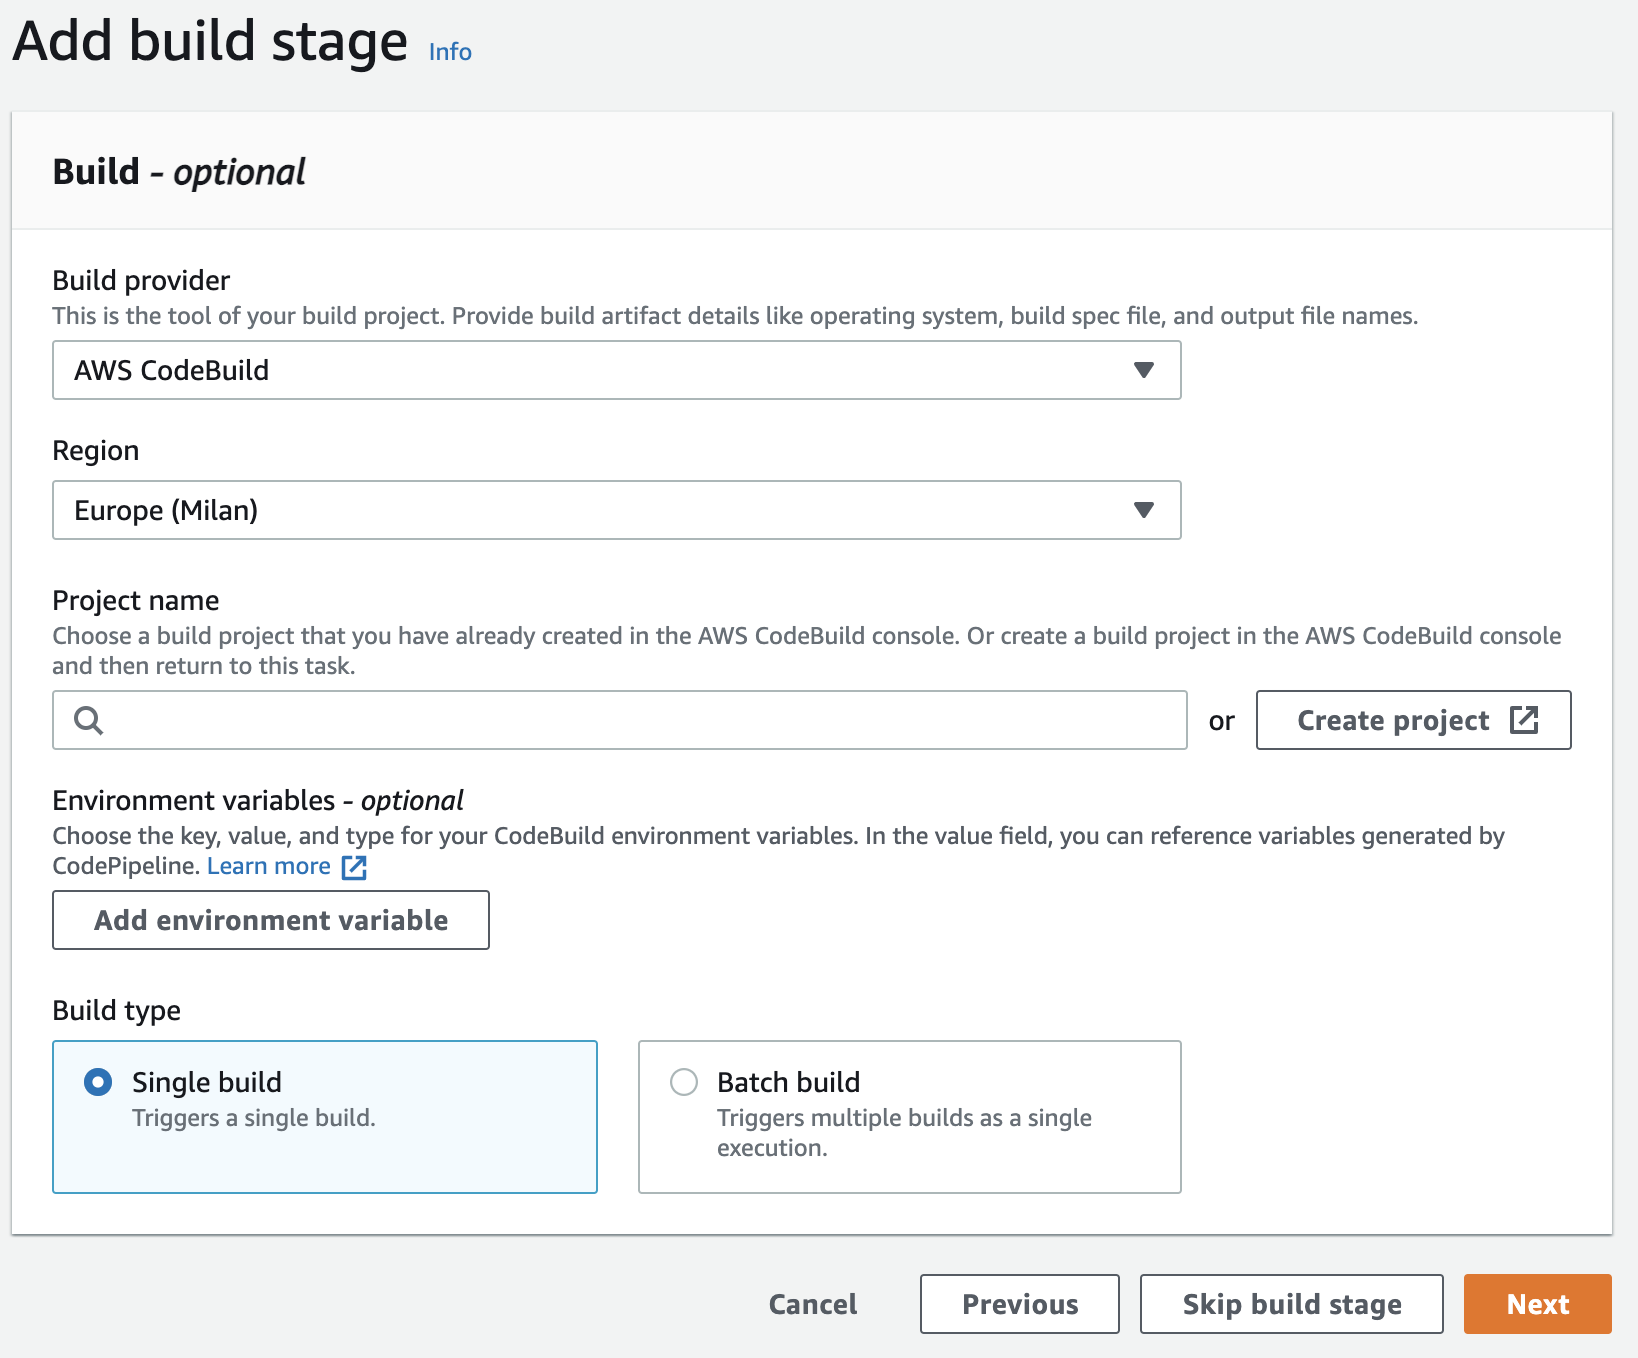
- Region: Your default region.
- Project name: Select your builder project or create a new one.
- Build type: Select single build to activate a single build for each change.
If you need to create a project builder, click on create project button.

Create an AWS CodeBuild project
CodeBuild compiles your source code, runs unit tests, and produces artifacts that are ready to deploy. The commands to execute in CodeBuild are described in a special file, called buildspec.yml that we created in the previous steps.
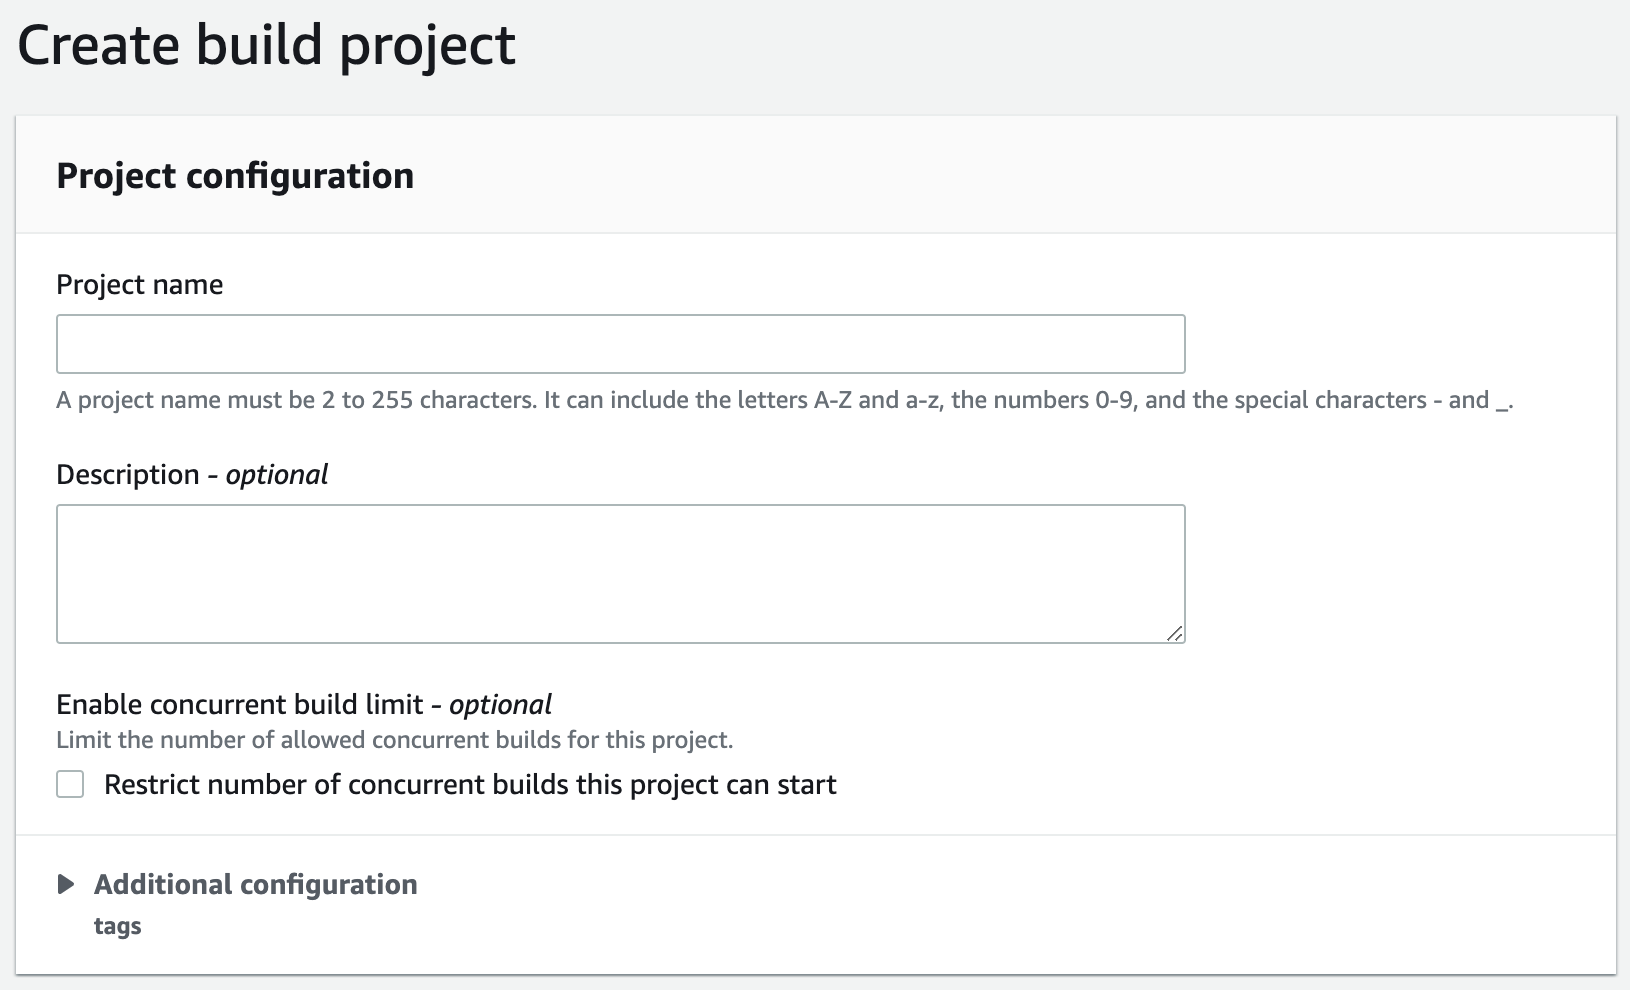
In the build project wizard, to get started, enter your project name and an optional description.
For the the environment section, select the following options.
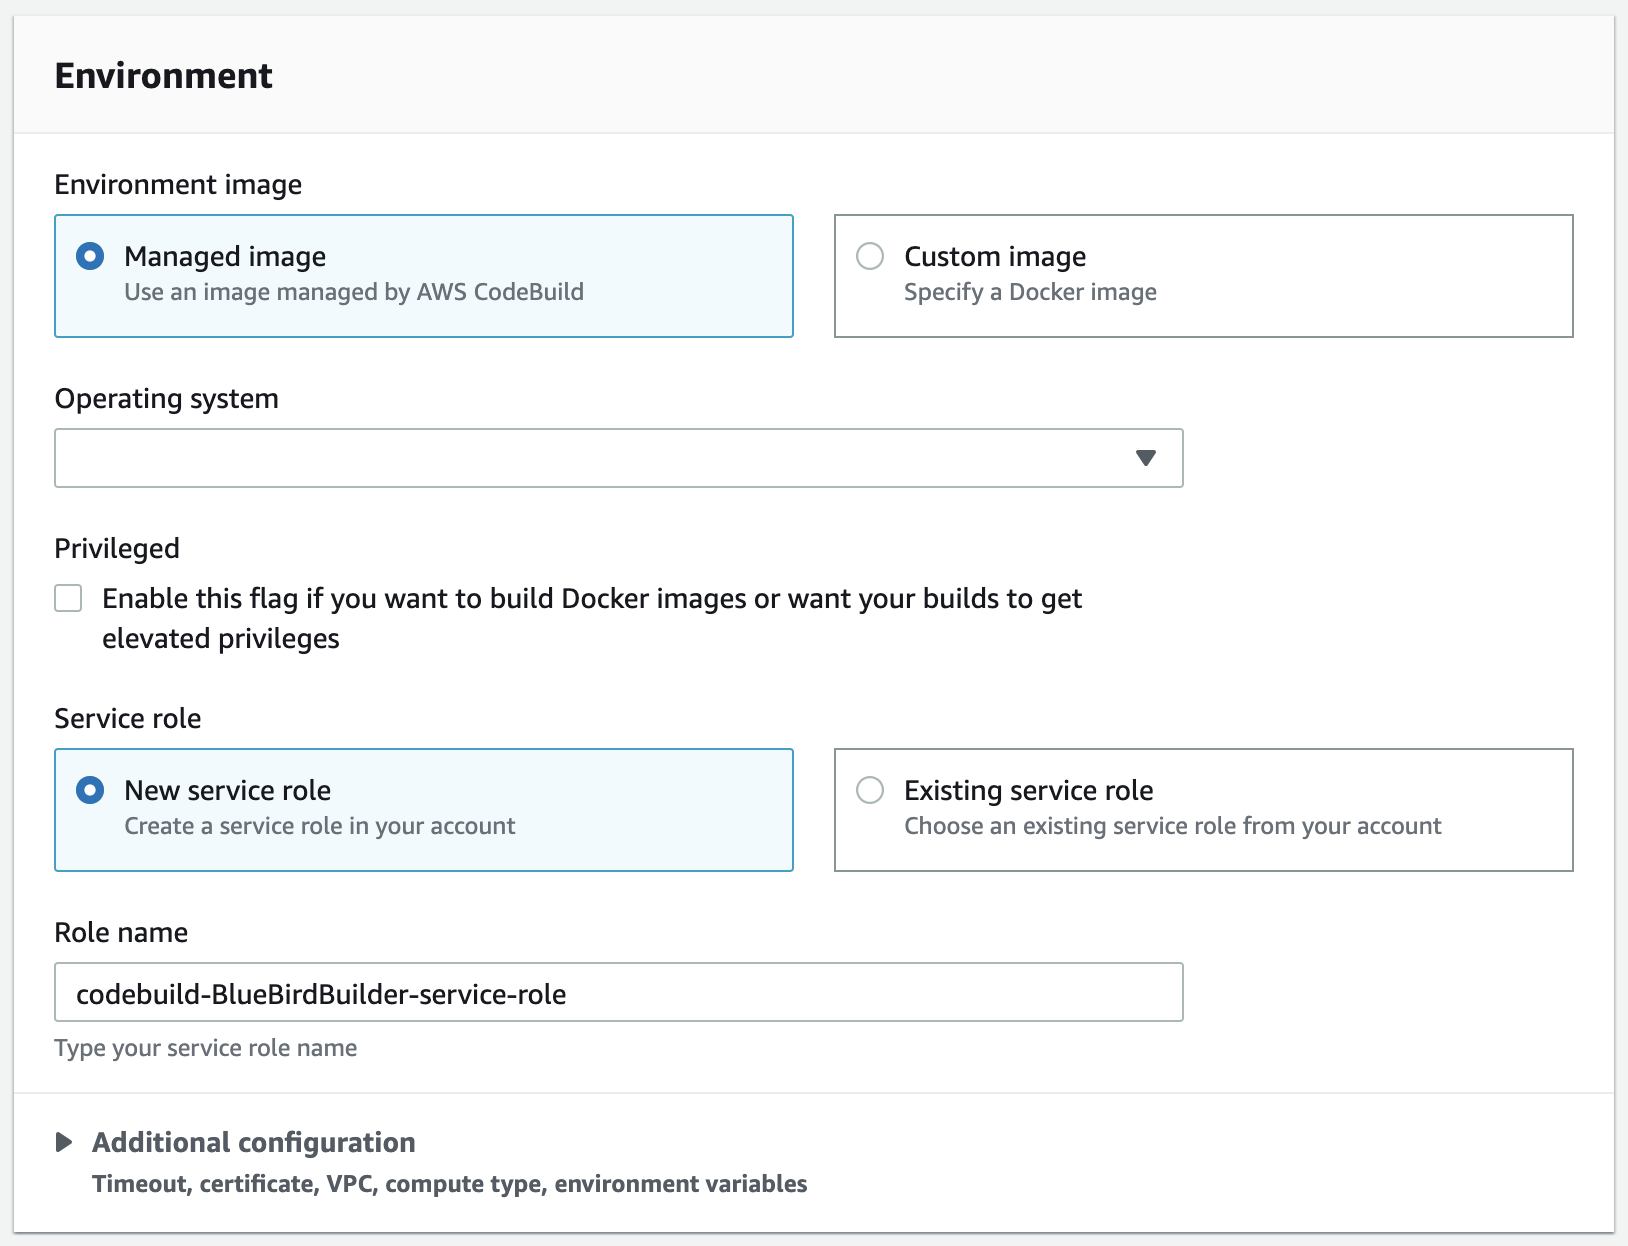
- Environment image: Managed image.
- Operation system: Ubuntu.
- Runtime(s): Standard
- Image: aws/codebuild/standar:5.0.
- Image version: Always use the latest image for this runtime version.
- Service role: Create or use an existing service role.
For the buildspec section, enter the path to your buildspec file. For example: .aws/codespec.yml, .idesoft/buildspec.yml.
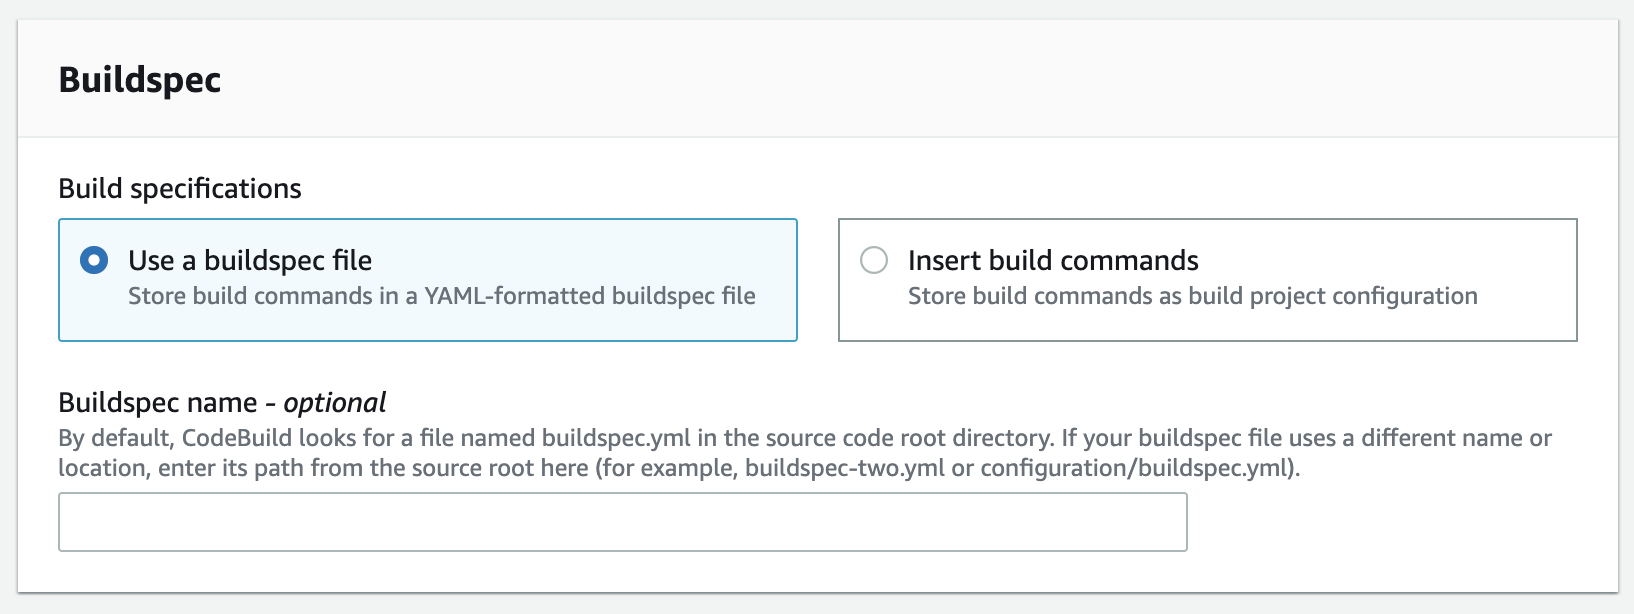
Important: If the buildspec file is in the root(top level) of the project. You can leave the field blank.
For the batch and logs settings, leave the default options, we use CloudWatch logs to view logs, metrics side by side and discover information to ensure that run smoothly.
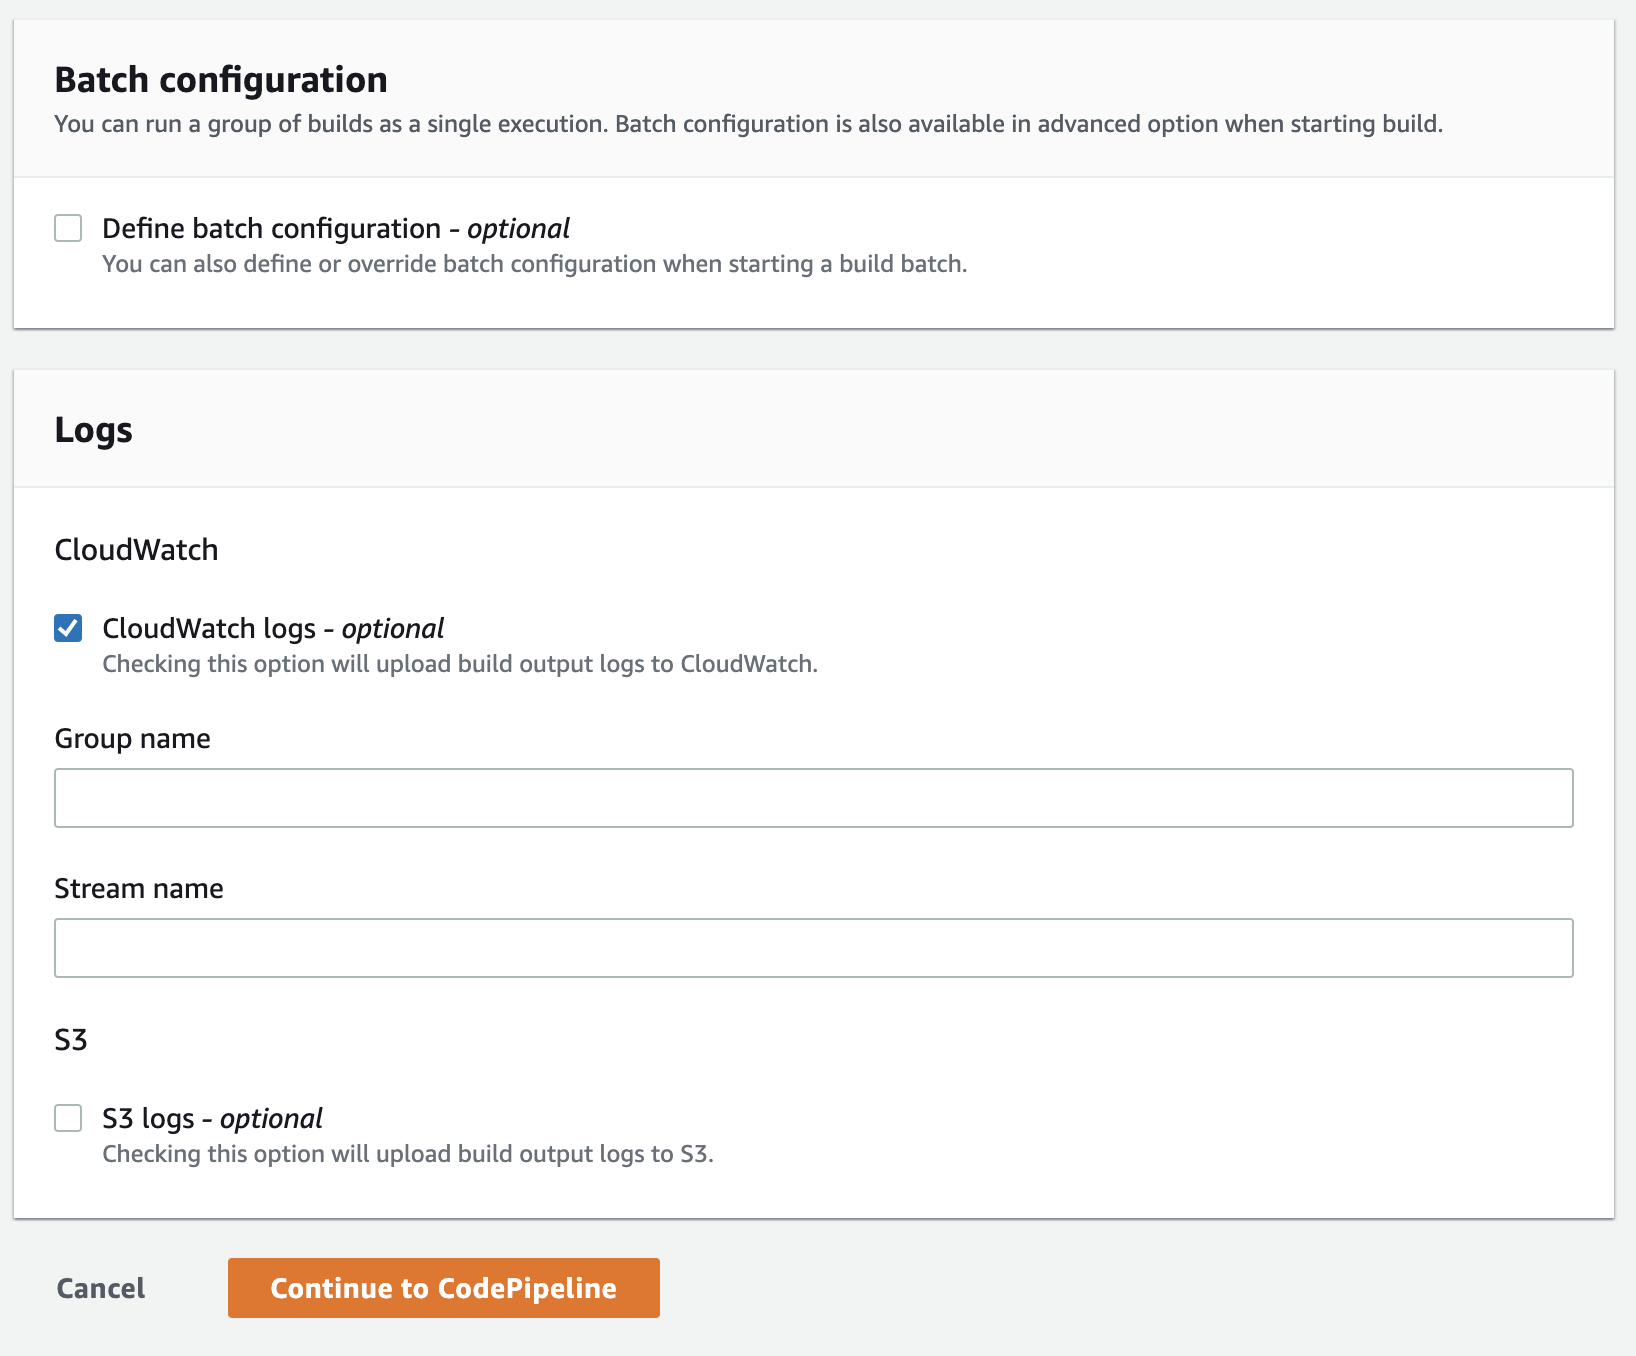
To finish, click on Continue to CodePipeline. It will then close the window and return back to CodePipeline configurations with a success message.

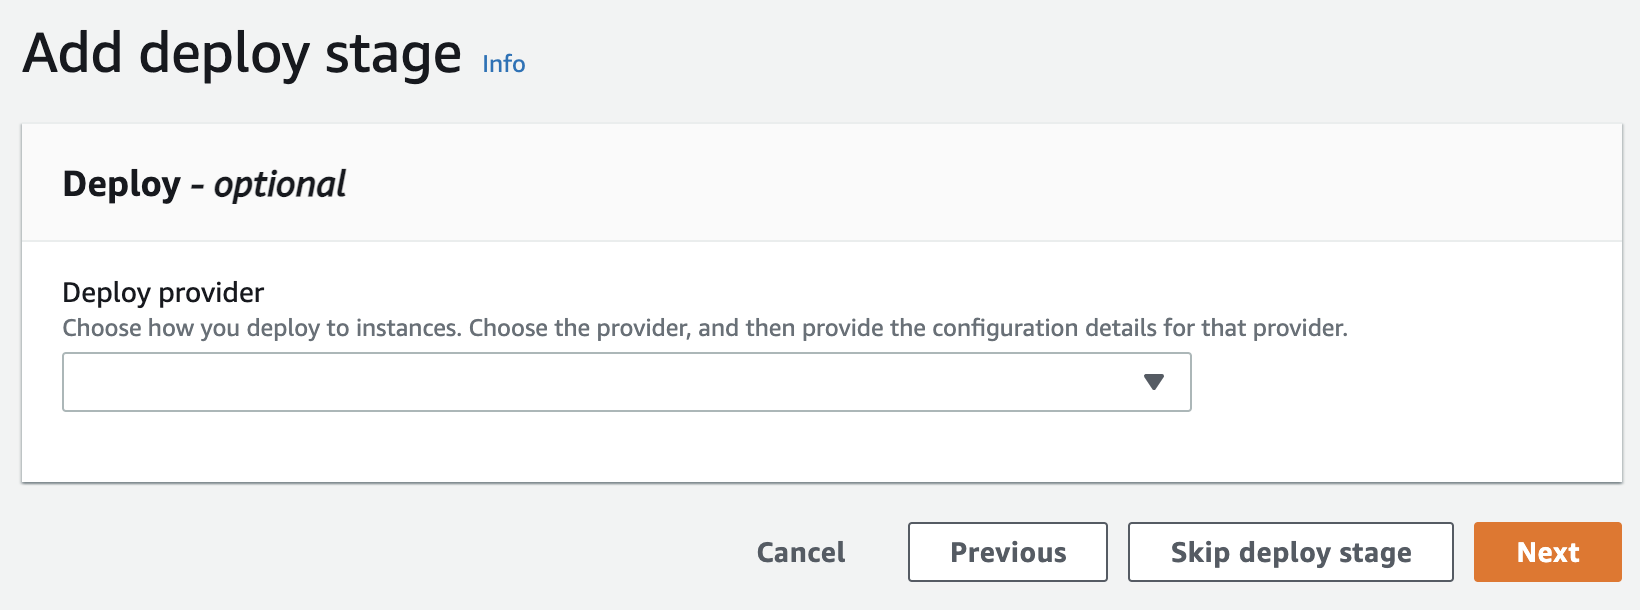
Deploy stage
As last step you can add a deploy stage to sync your dist folder with a AWS S3 Bucket, but we use our CodeBuild project to do this, so click on Skip deploy stage.
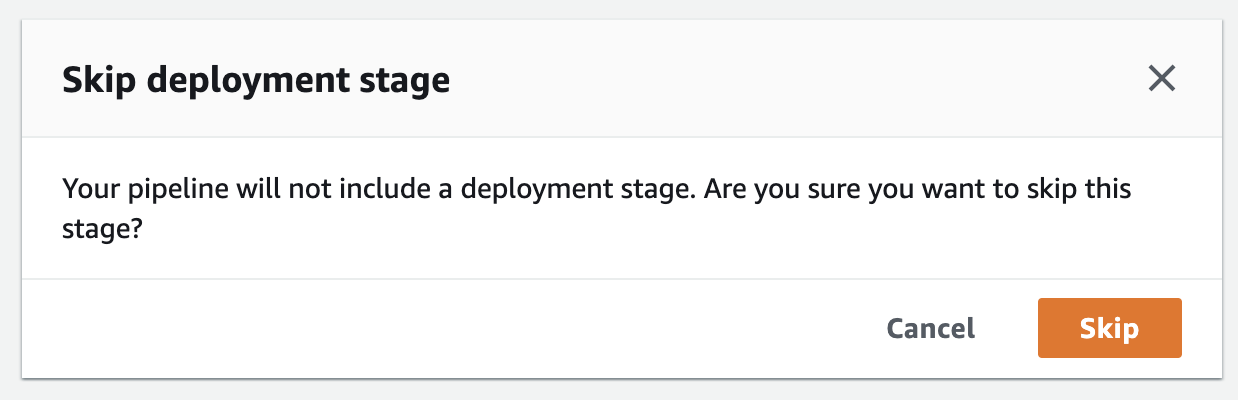
This will display a modal dialog, and ask you to confirm, click on Skip.
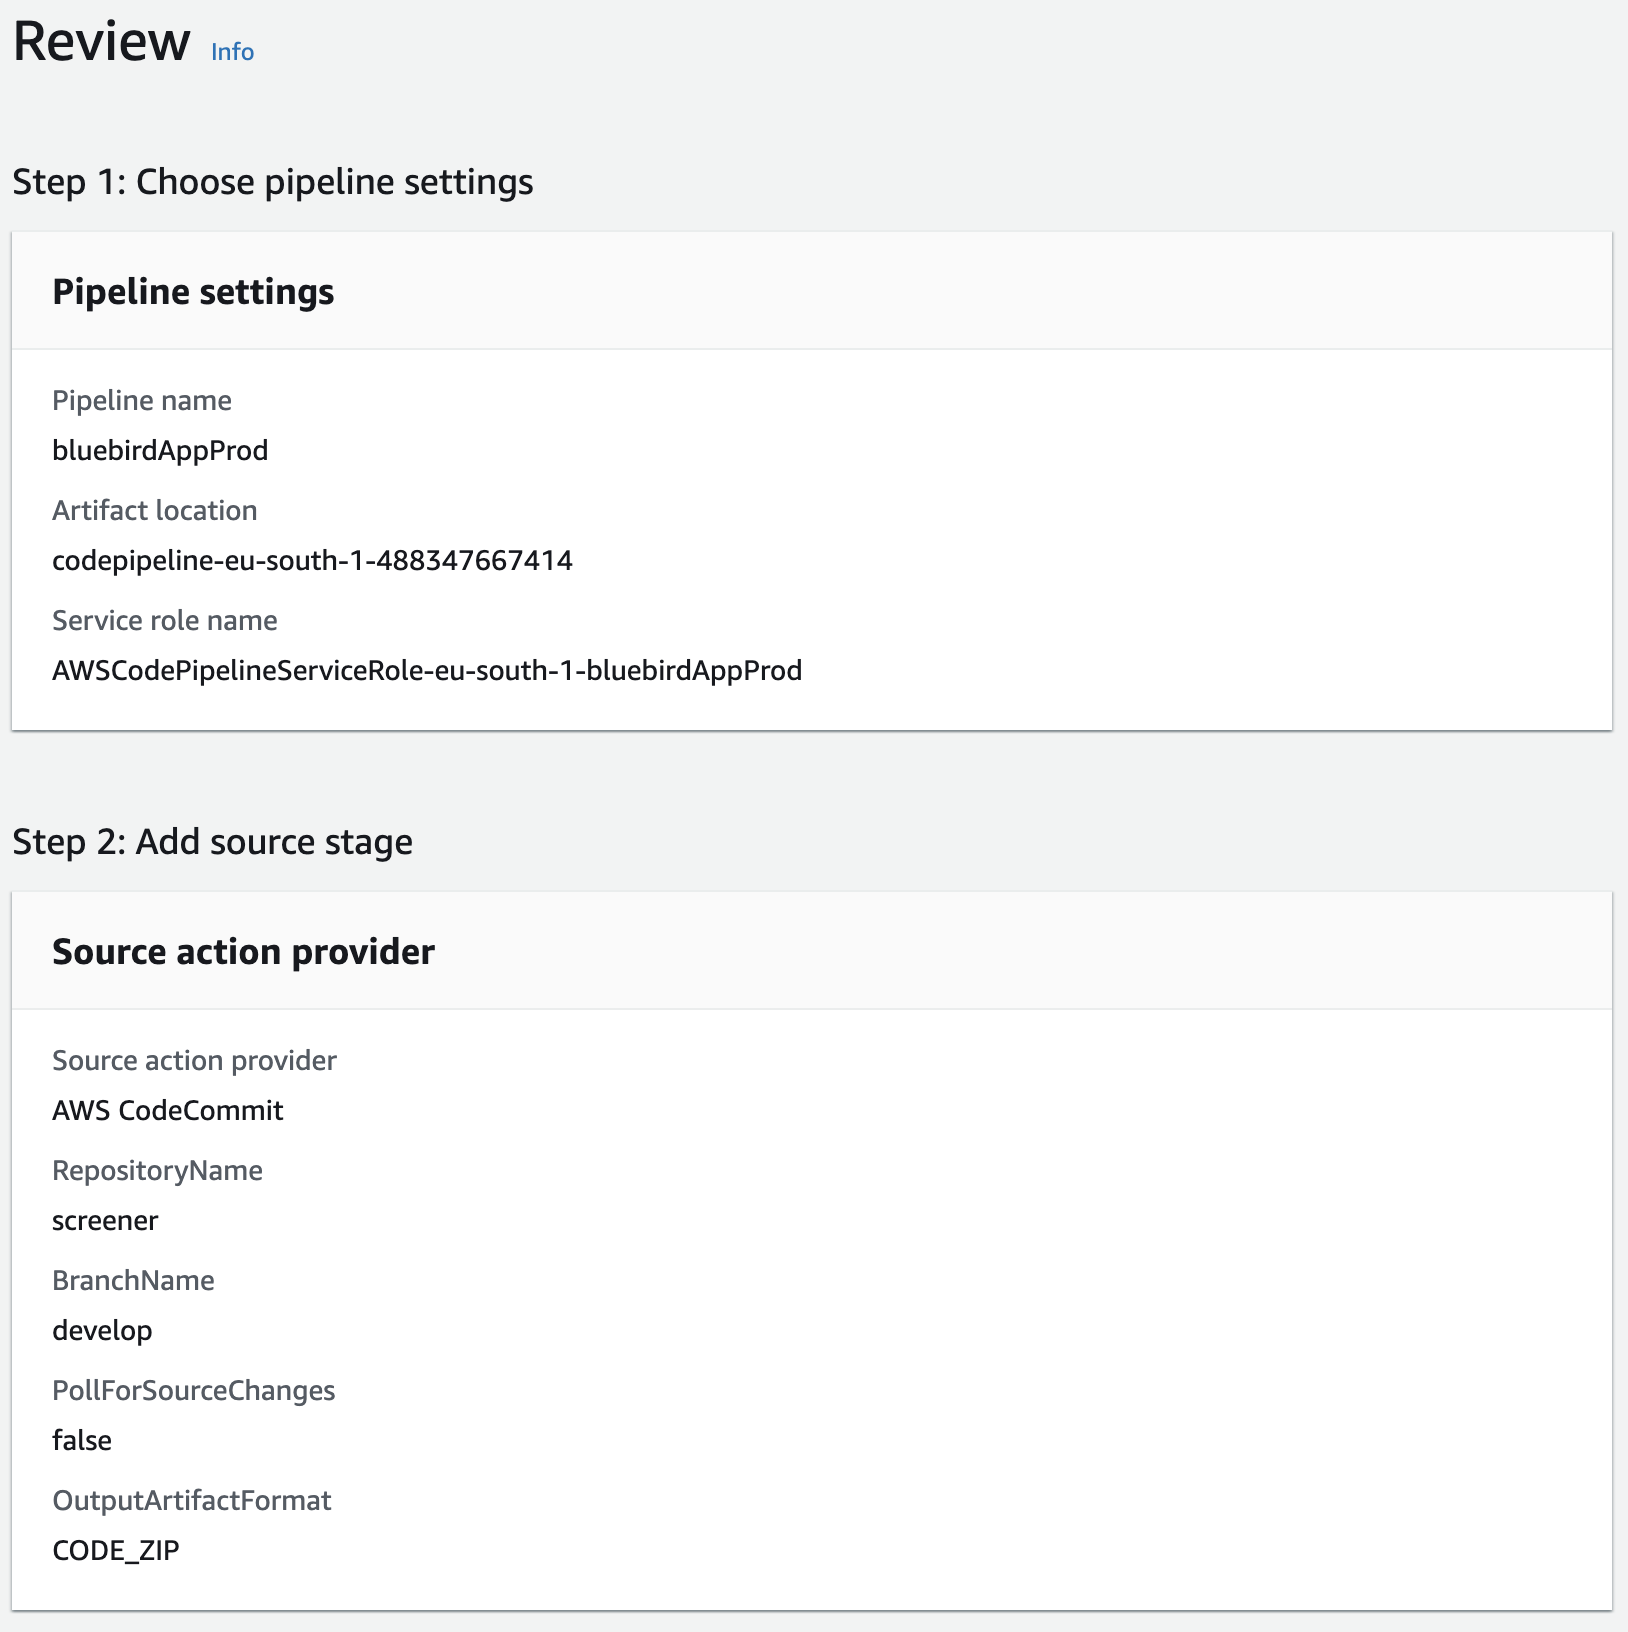
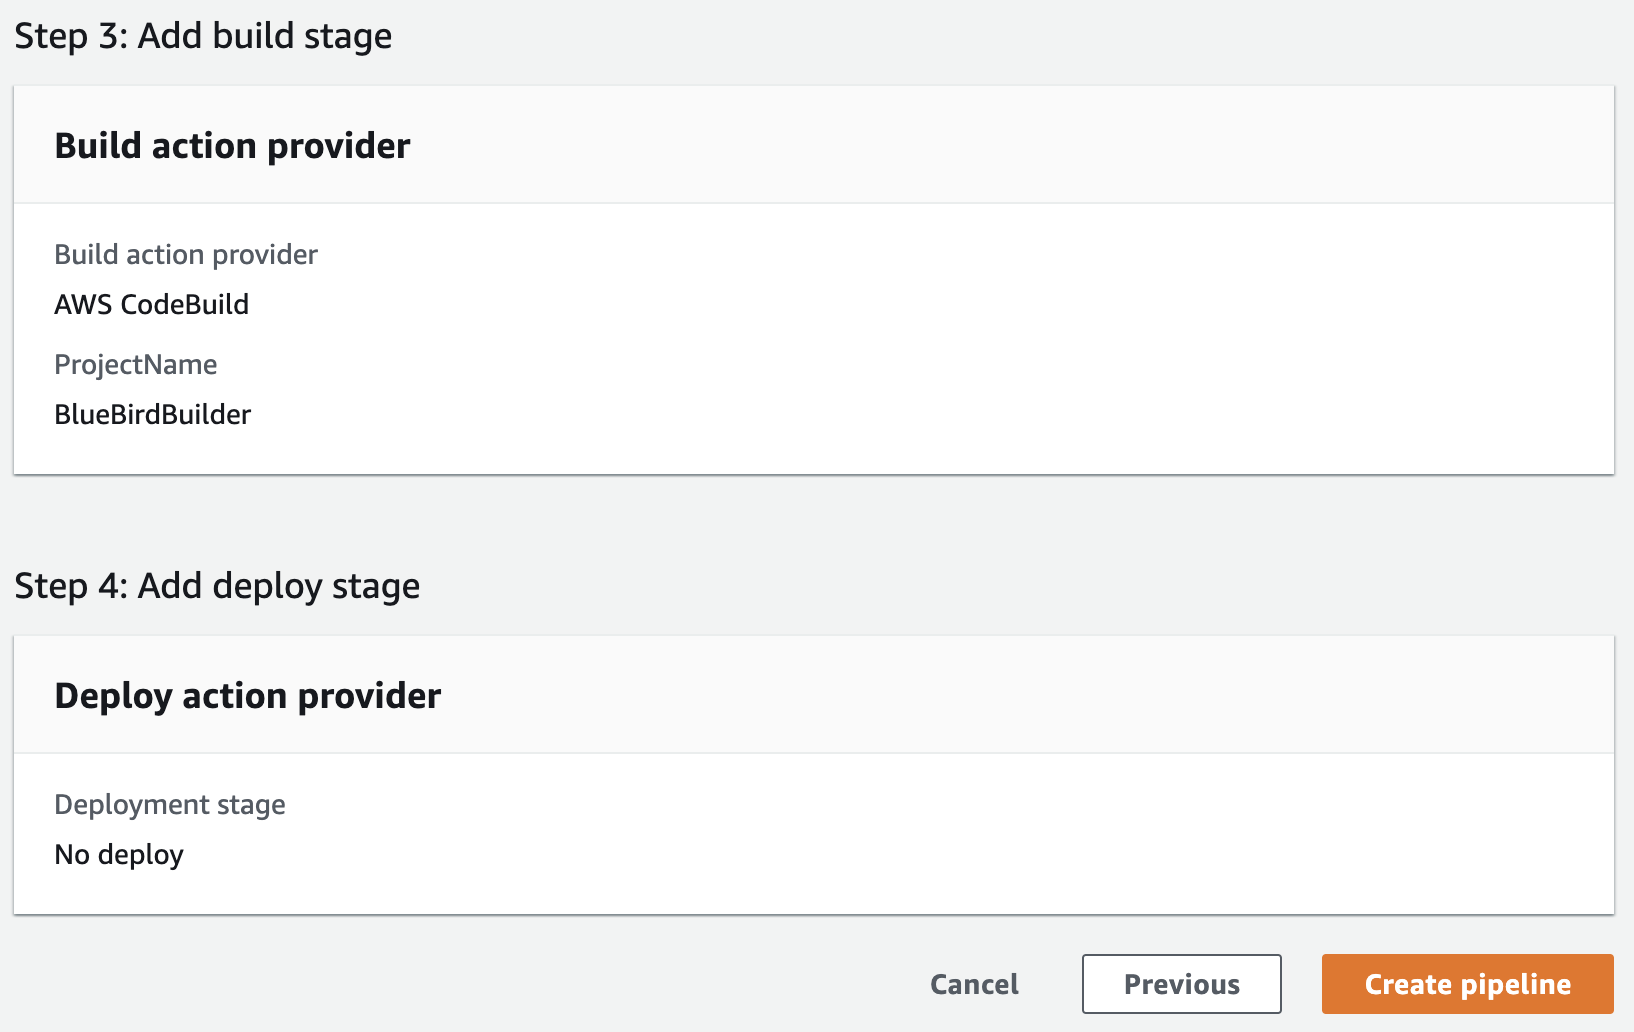
CodePipeline Review
Then, review the configurations. Once you are satisfied, hit Create pipeline.
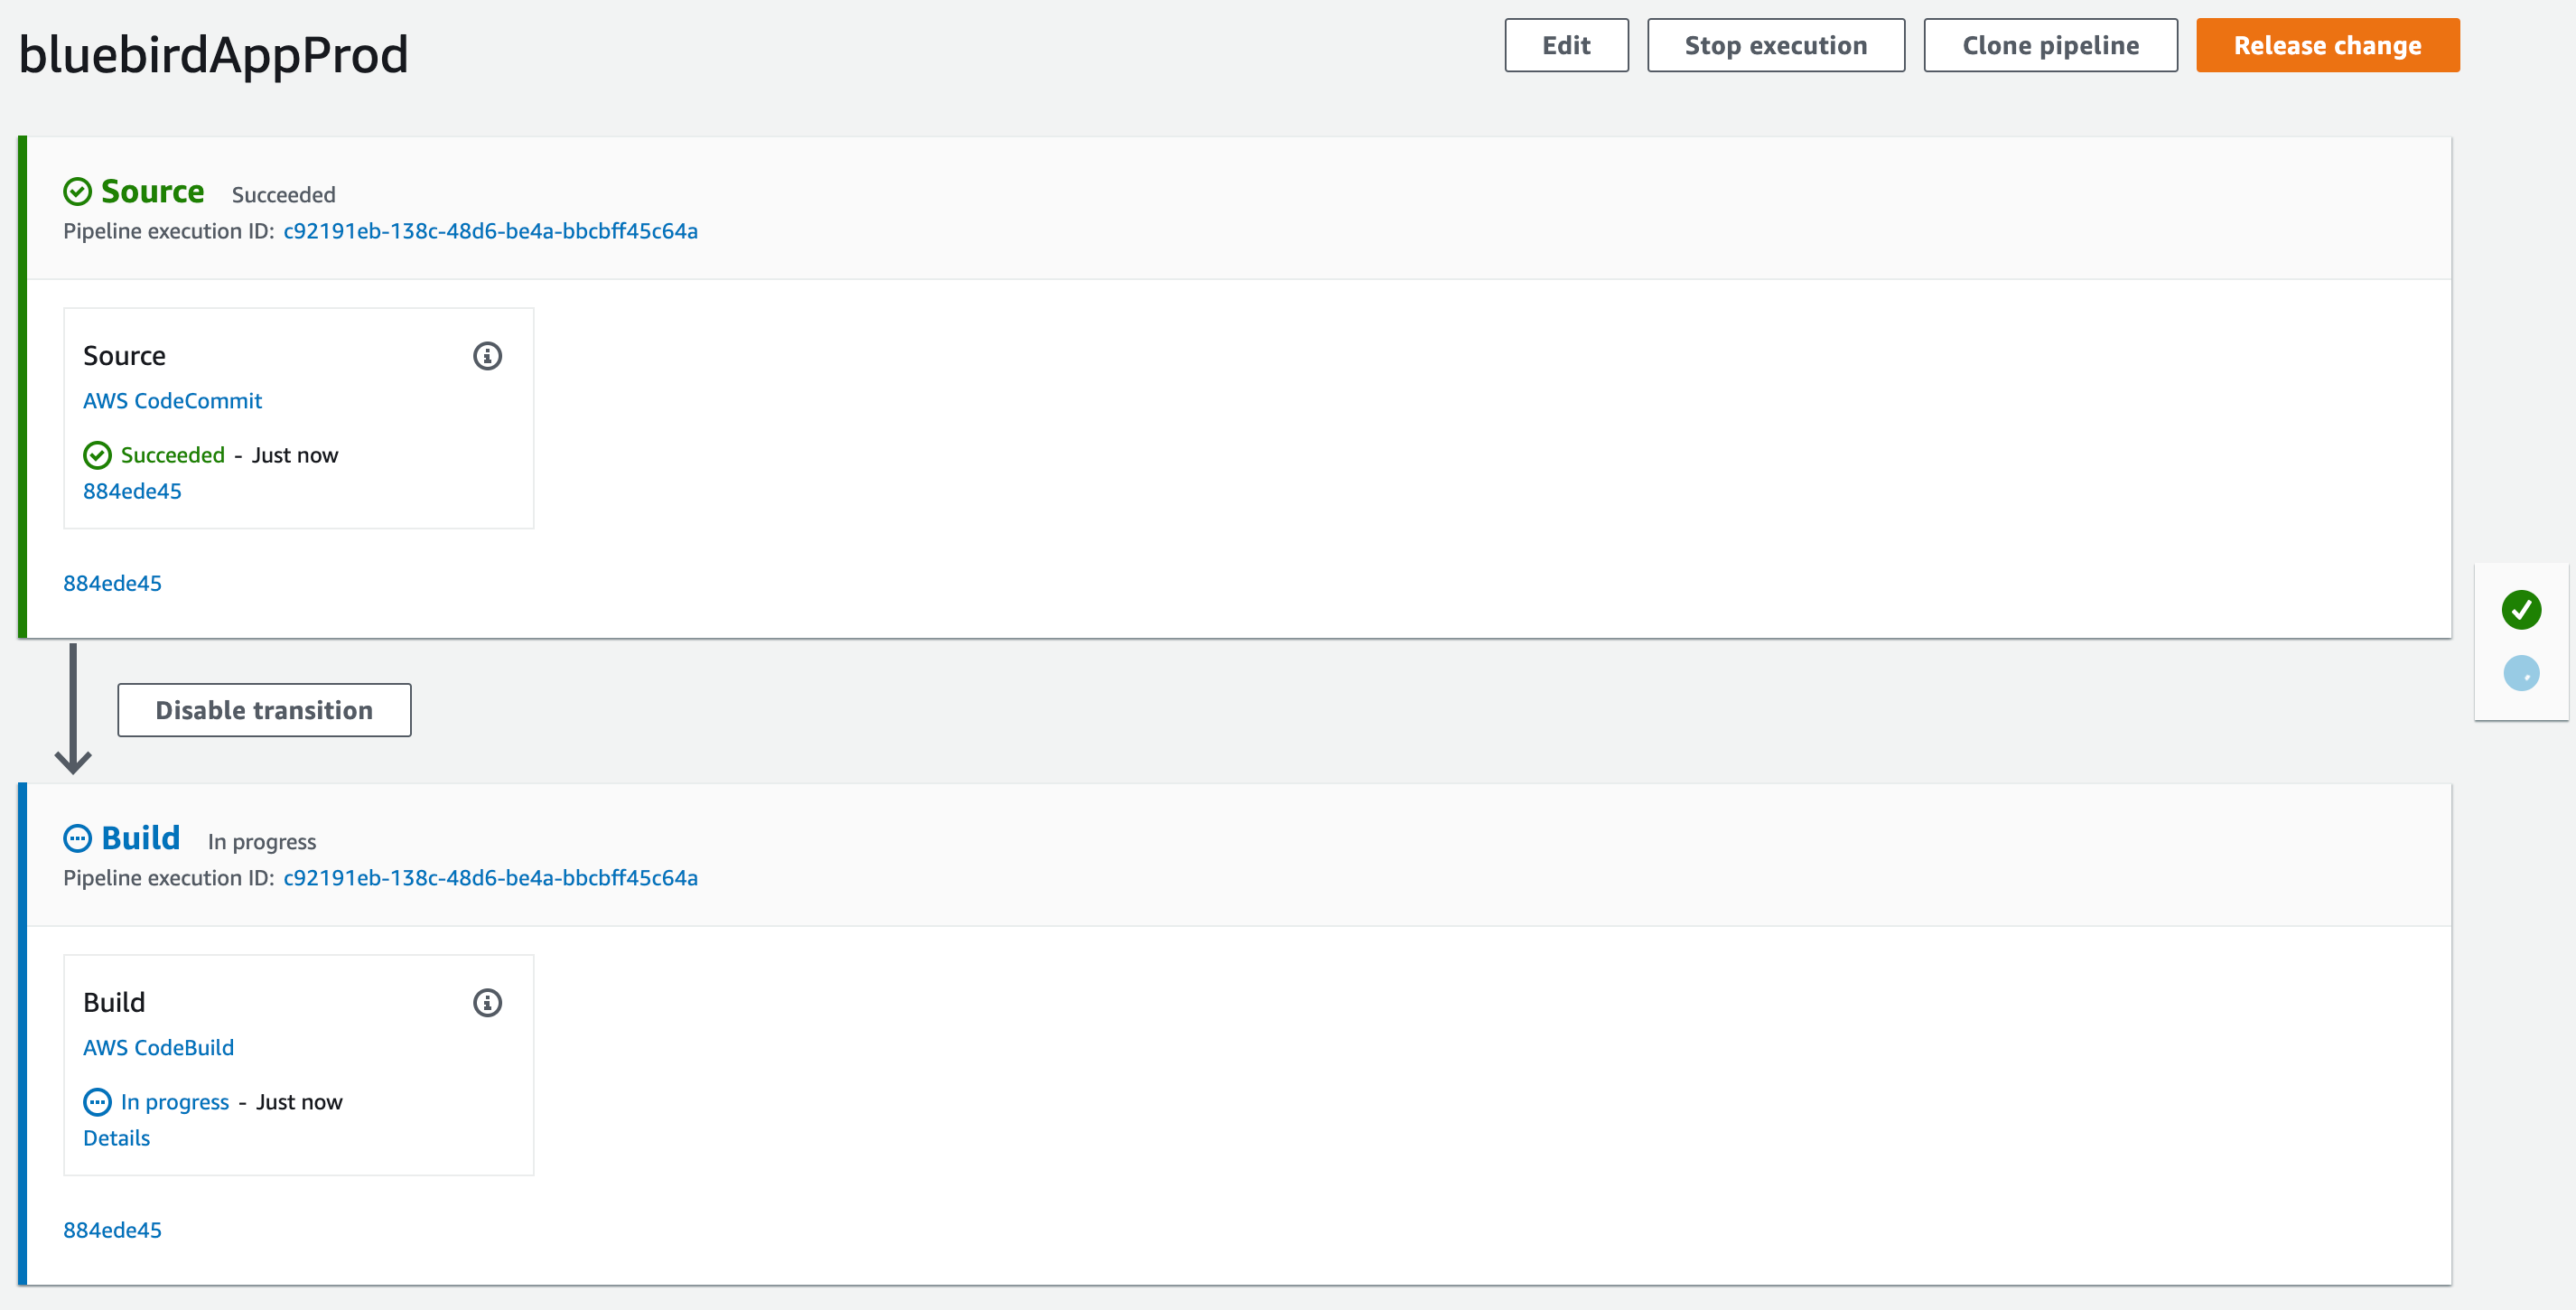
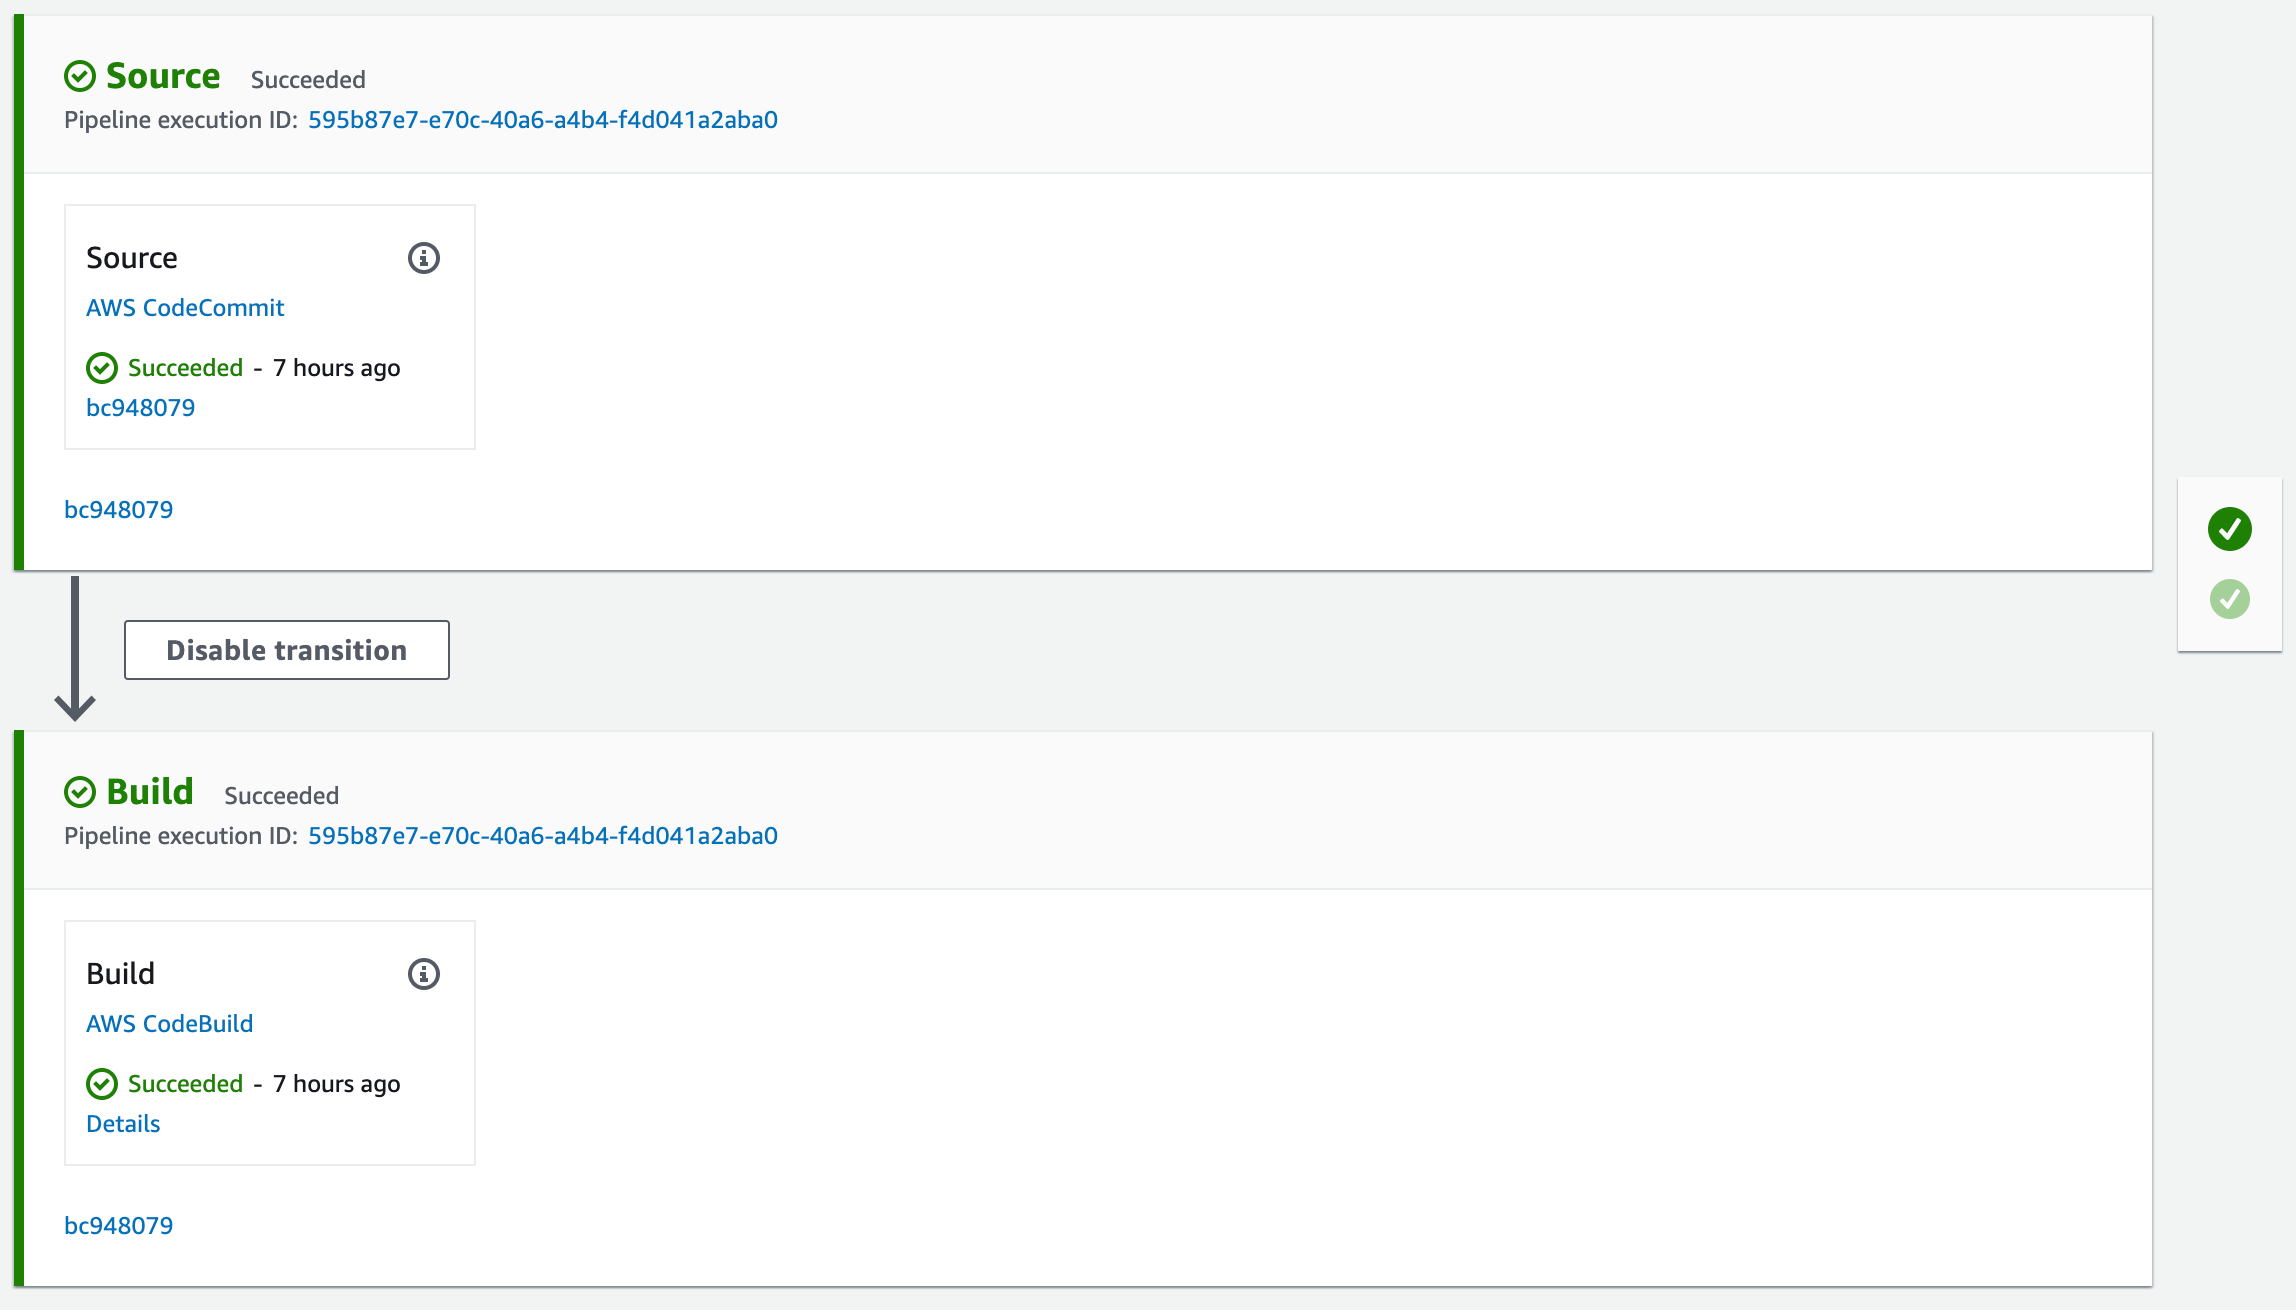
Once a pipeline has been created, it automatically tries to run for the first time. The image below shows the progress in a visual representation of your pipeline.
Identity and Access Management(IAM)
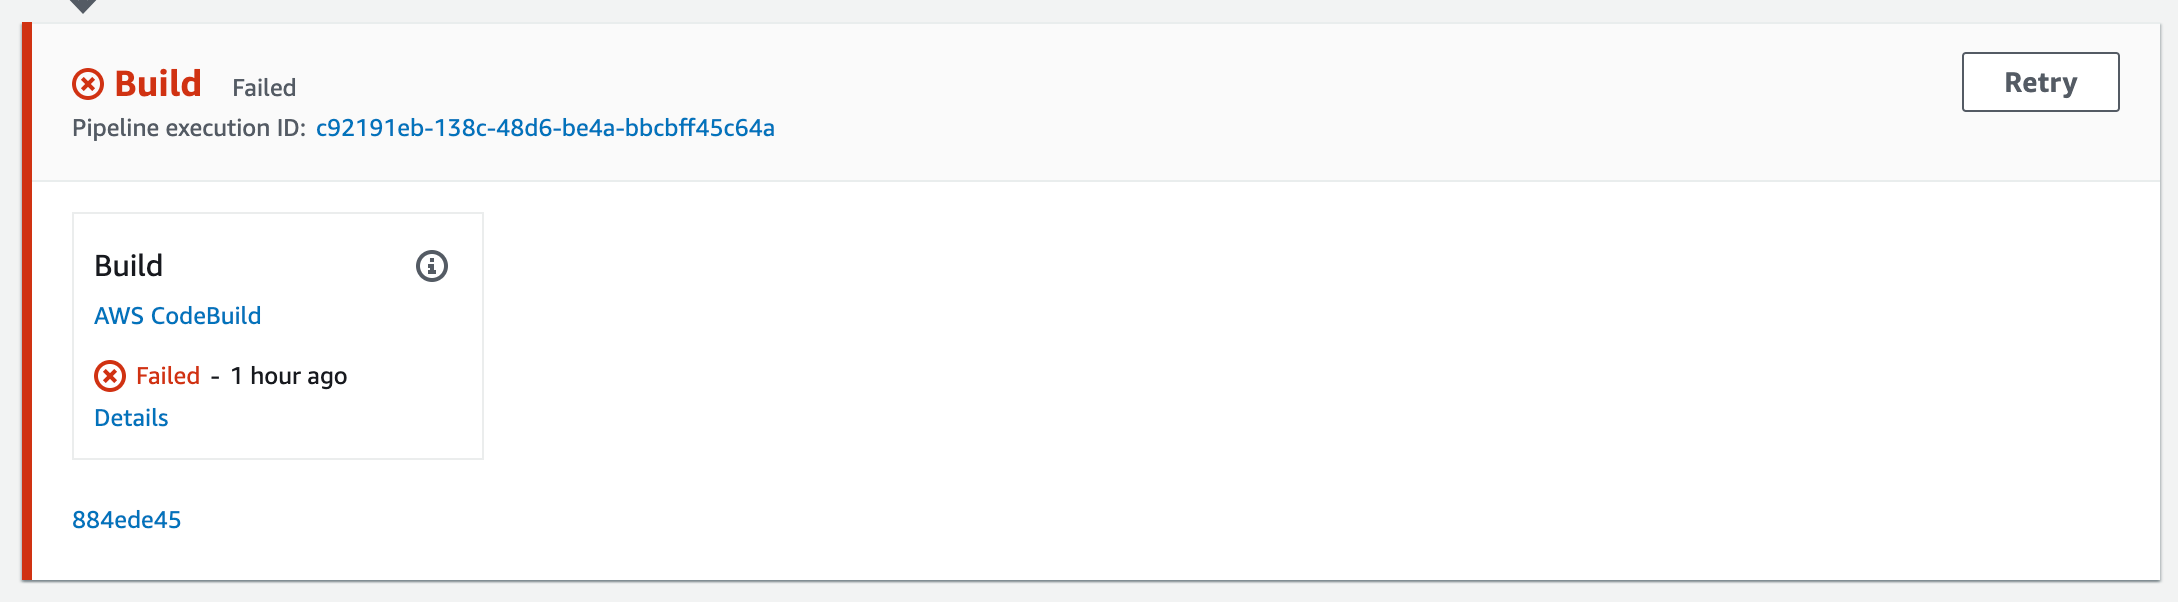
After a few minutes, the build stage fails, because we haven’t added S3 Access Policy yet.
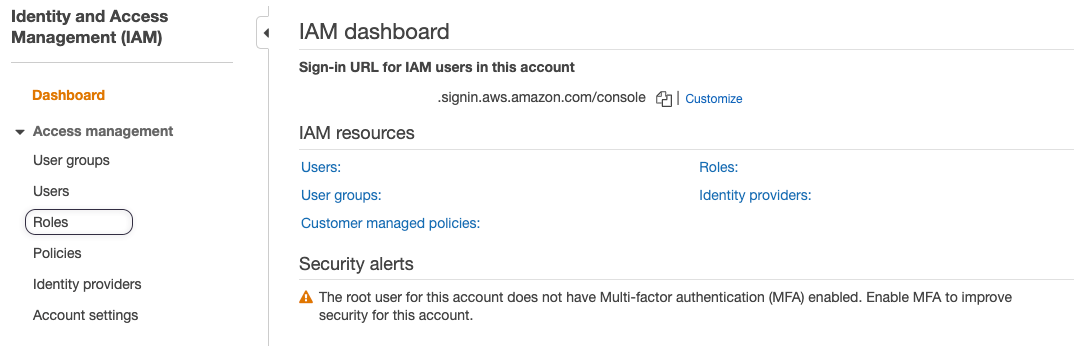
To solve this, you need to navigate to IAM Console(you can do this under AWS services search for IAM), then click on the Roles menu.
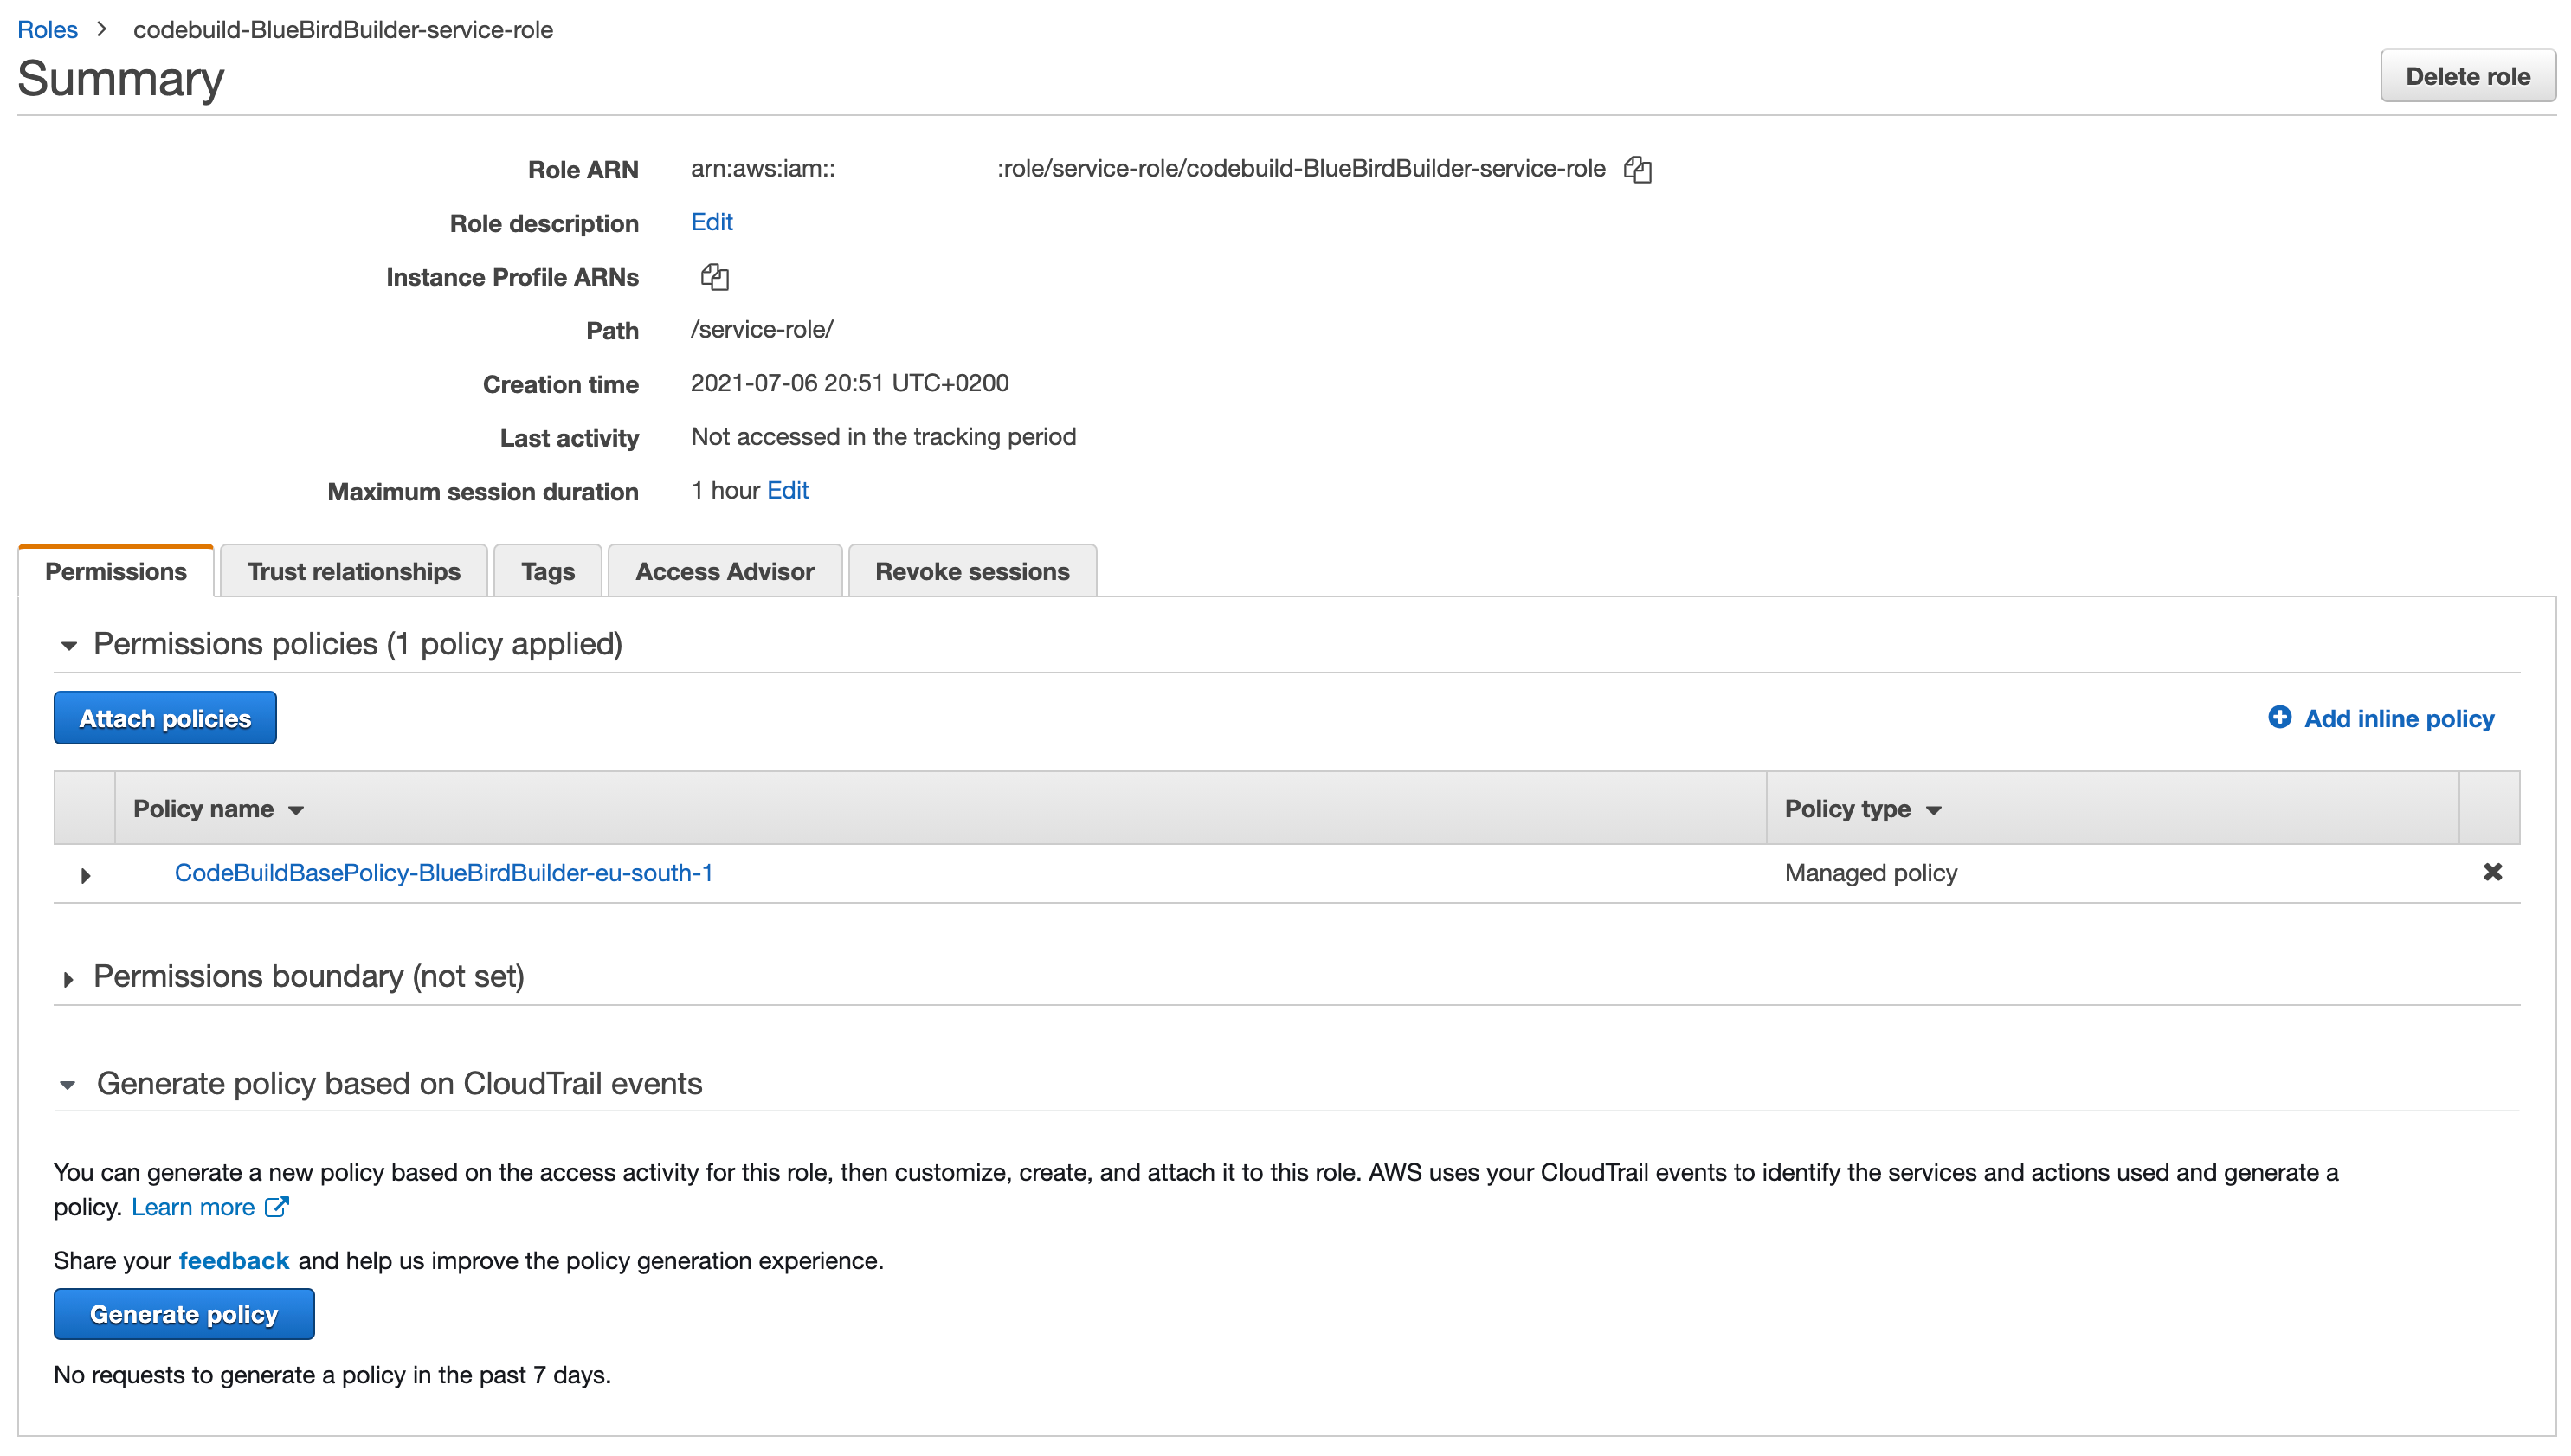
On the next page, look for the role created earlier for CodeBuild(You can find it by looking at the Trusted entities column with AWS service: codebuild text).

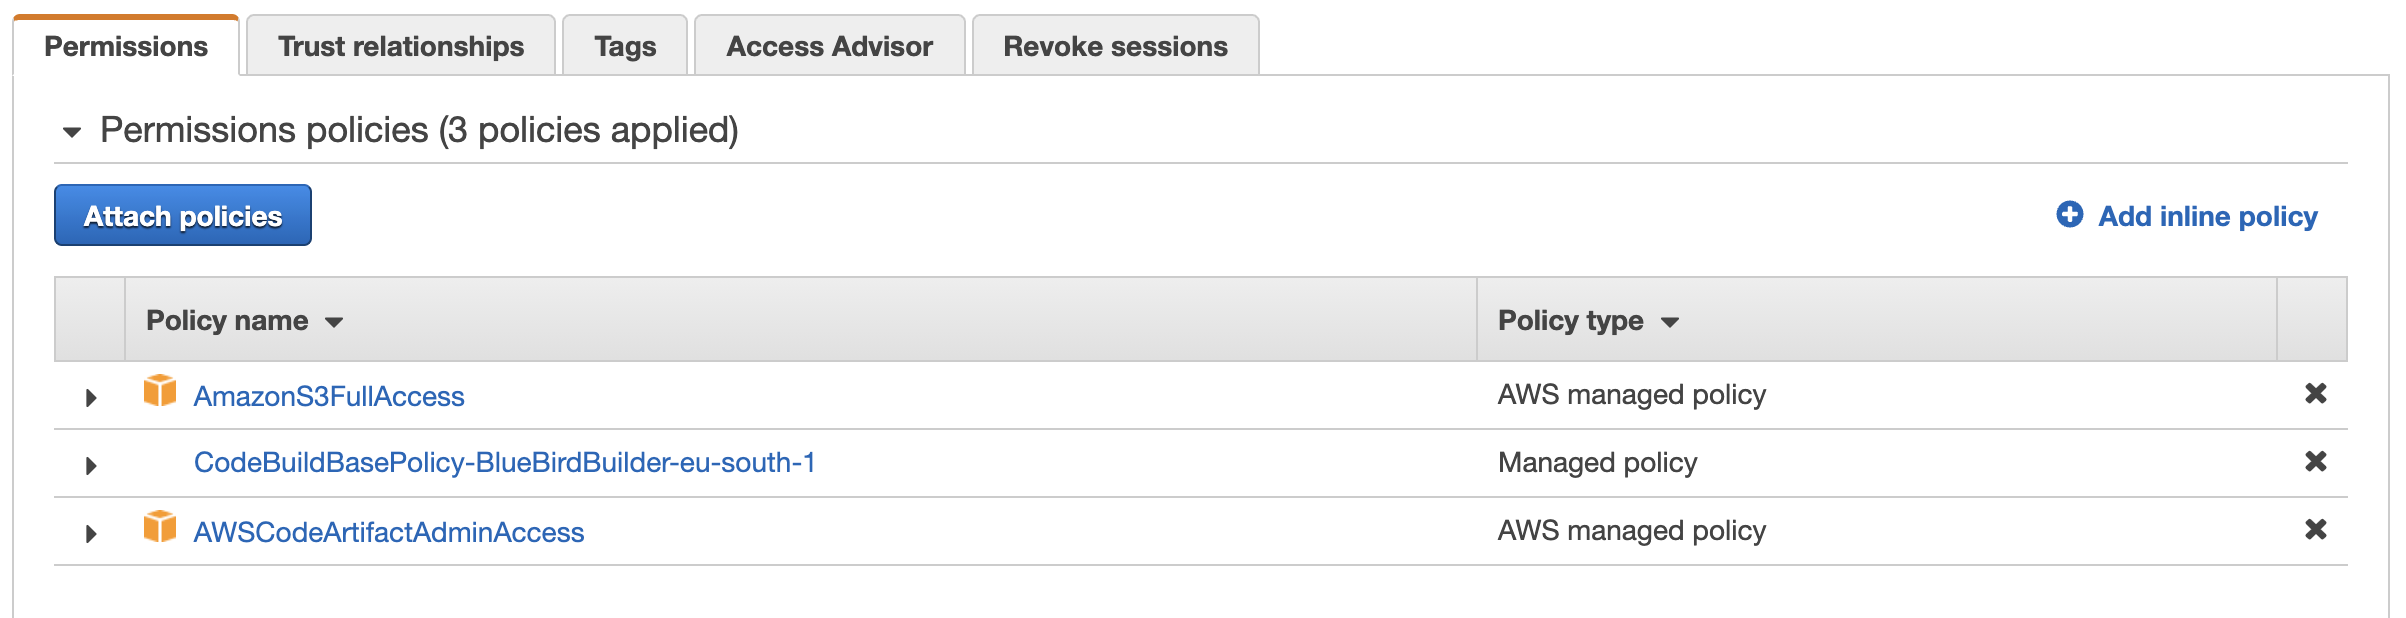
When you have located the role, click on it to open the detail. After that, click on Attach policies.
In the Policies list, look for AmazonS3FullAccess and select it. This policy allows CodeBuild to push content to the S3 bucket.
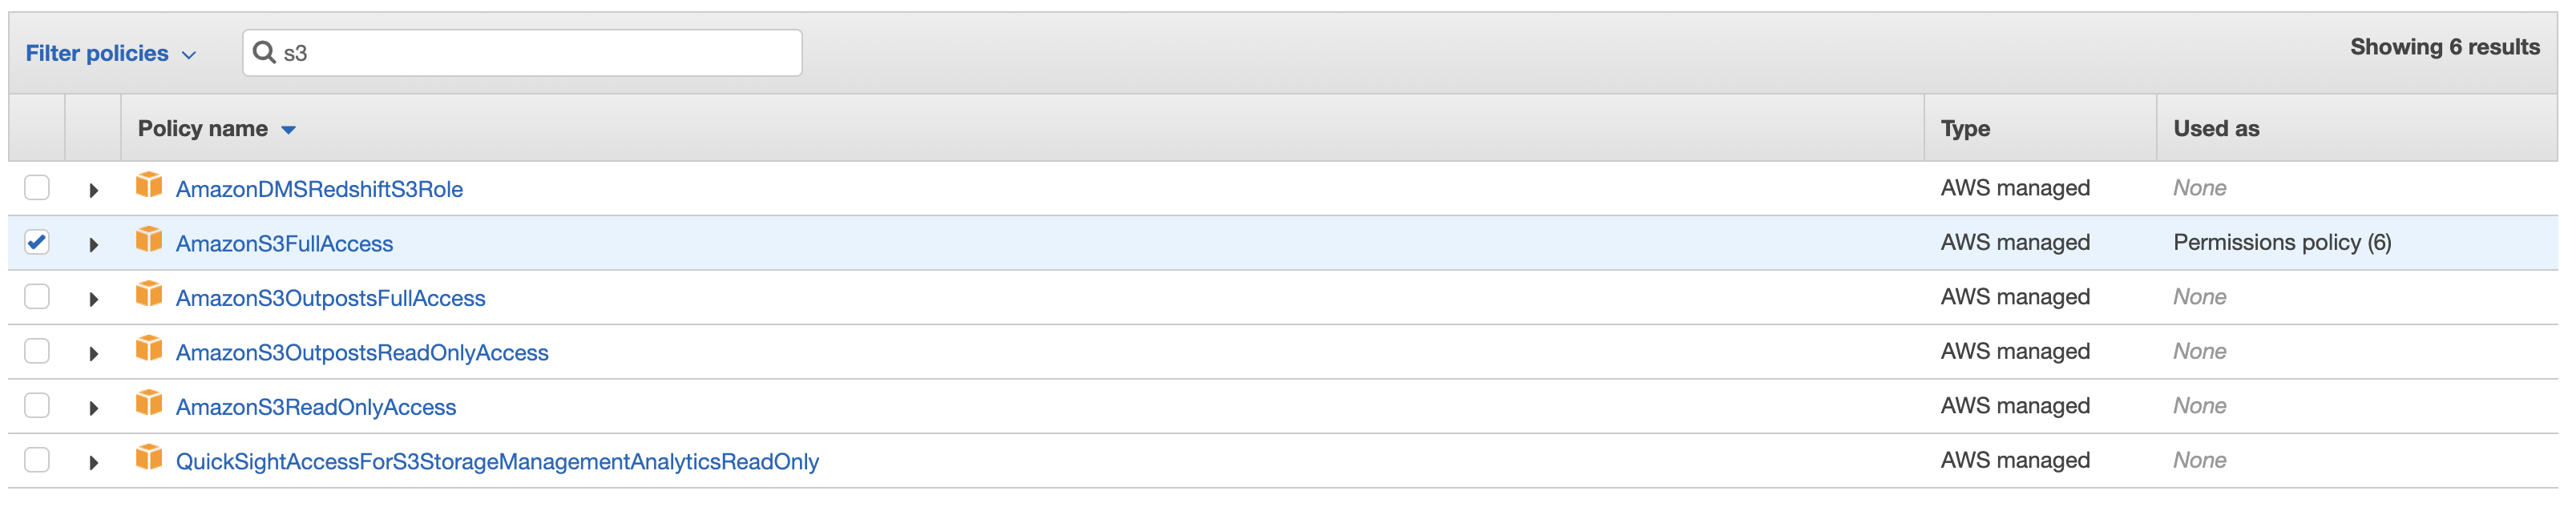
If you are using CodeArtifact you must add CodeArtifact policy; to do this look for AWSCodeArtifactAdminAccess and select it. This policy allows CodeBuild to access the CodeArtifact repositories.
Once the policies has been selected, click on Attach policies.

Then, review the configurations, you should see AmazonS3FullAccess and AWSCodeArtifactAdminAccess listed.
With the Access Policies fixed, we can run the pipeline properly. Go to CodePipeline and find the pipeline we just created. In the build stage, hit Retry.
After a few minutes, you should see the pipeline fully deployed.
Wrapping up!
Congratulations! You’ve set a CI/CD pipeline. Now you only need to worry about codebase and let CodePipeline handle the deployment for you!.
This has been the most basic example of a CodePipeline workflow using CodeCommit, CodeBuild and S3. So, this can serve as a starting point for implementing CI/CD in your projects.